What Causes Adult Acne and How to Actually Get Rid of It | As Seen in The Cut
Adult acne is more common than most people realize. And, it’s often more stubborn and complex than the breakouts you dealt with as a teenager. Dr. Mona Foad, featured in The Cut, breaks down exactly what drives adult acne, from hormonal fluctuations and stress. She shares the most effective treatments, ingredients, and lifestyle changes to clear it for good.

What causes adult acne?
Various factors can cause adult acne, often different from those that cause acne in teenagers. One factor is hormone fluctuations, which can increase oil production in the skin, leading to clogged pores and acne. Additionally, high stress levels can trigger the production of cortisol, a hormone that can increase oil production and exacerbate acne. Using skin care products that are too heavy, greasy, or unsuitable for your skin type can clog pores and lead to acne. Using certain medications, such as corticosteroids, anabolic steroids, and lithium, can also cause acne as a side effect.
Furthermore, underlying health conditions can cause hormonal imbalances that lead to acne. Environmental factors like pollution and exposure to oily or greasy substances can also contribute to acne development. Genetics is another factor that can increase the likelihood of developing adult acne.
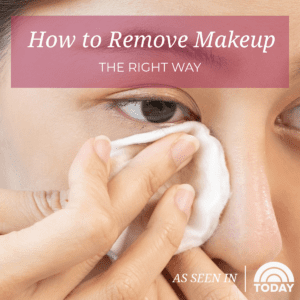
In addition, frequently touching your face or letting hair (especially if oily or with hair products) come into contact with your face can transfer oils and bacteria, causing acne. Poor skincare habits like not cleansing the skin properly, over-exfoliating, or not removing makeup before bed can also lead to clogged pores and acne.
How is it different from other types of acne?
Adult acne differs from other acne in multiple ways, from causes to affected areas and treatment approaches. Teenage acne typically begins during puberty due to hormonal changes that increase oil production. In contrast, adult acne can occur in individuals over 25, often due to hormonal changes, stress, and other factors. Teenage acne is strongly influenced by the surge of androgens (male hormones) during puberty, whereas adult acne is often linked to hormonal fluctuations related to menstrual cycles, pregnancy, menopause, and conditions like polycystic ovary syndrome (PCOS).
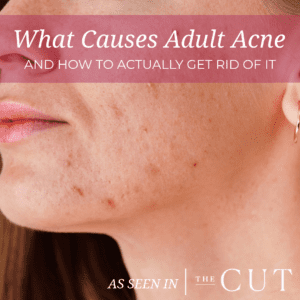
Teenage acne frequently appears on the forehead, nose, and chin (the T-zone). Adult acne, on the other hand, more commonly affects the lower half of the face, including the jawline, chin, and neck. When we see this distribution of acne along the jawline, we usually know that there is a hormonal component involved.
The type of lesions also differs between teenage and adult acne. Teenage acne includes a variety of lesions such as blackheads, whiteheads, pimples, cysts, and nodules. Adult acne, in contrast, often presents as inflammatory lesions like papules, pustules, and cysts and is less likely to include non-inflammatory lesions like blackheads and whiteheads. Teenage skin is generally more resilient and recovers faster from acne lesions, though it can still develop scarring depending on severity. Adult skin is typically more sensitive, slower to heal, and more prone to post-inflammatory hyperpigmentation.
Treatment approaches also differ. Teenage acne is often treated with over-the-counter topical treatments. And in severe cases, prescription retinoids, topical and oral antibiotics, or hormonal treatments. Teenagers may be prescribed Accutane more frequently than adults due to the severity of the acne and to reduce long-term scarring.
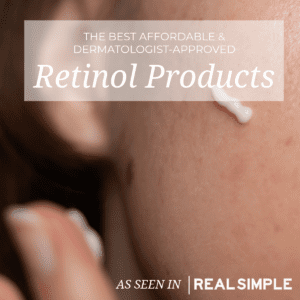
Adult acne may require a gentler approach due to more sensitive skin. Topical options like benzoyl peroxide and salicylic acid may be used at lower, less irritating percentages. Instead of a prescription retinoid such as tretinoin, an over-the-counter retinol may be a better fit. Hormonal therapies such as oral contraceptives or anti-androgens may also play a bigger role. Although not as common, Accutane may still be used in resistant cases.
What is the best way to get rid of adult acne?
Getting rid of adult acne often requires a comprehensive approach that includes proper skincare, lifestyle adjustments, and sometimes medical treatments.
For skincare, start with a gentle, non-comedogenic cleanser like SkinMedica’s Pore Purifying Gel Cleanser twice daily to remove dirt, oil, and makeup. Chemical exfoliants like SkinMedica’s AHA BHA Exfoliating Cleanser can help unclog pores and promote cell turnover. Depending on your skin type, this can be used once a week or once daily.
Topical treatments also play an important role. Benzoyl peroxide helps reduce bacteria and clear pores. Retinoids encourage cell turnover and prevent clogged pores. Salicylic acid penetrates pores to exfoliate and reduce inflammation. Keep in mind that you may only be able to introduce one exfoliating product at a time to avoid drying out the skin. Niacinamide is a wonderful addition to help reduce inflammation and regulate oil production.
A lightweight, non-comedogenic moisturizer helps hydrate the skin without clogging pores. I recommend CleananceHYDRA Soothing Cream or SkinMedica’s Ultra Sheer Moisturizer. Daily broad-spectrum, non-comedogenic sunscreen is also essential to protect the skin and prevent hyperpigmentation from acne.
Lifestyle adjustments matter too. Incorporate a balanced diet rich in fruits, vegetables, whole grains, and lean proteins, and reduce refined sugars. Drink plenty of water to keep the skin hydrated and support overall health. Practice stress-reducing activities such as yoga, meditation, or regular exercise. Prioritizing sleep and consistent movement can also improve circulation and reduce stress-related breakouts.
For more persistent cases, medical treatments are available. Options include prescription topical retinoids, oral antibiotics, and hormonal therapies. Accutane remains an option for more severe cases. In-office treatments such as chemical peels, facials, laser and light therapy, and corticosteroid injections can also be helpful adjuncts to a at-home routine.
What kinds of ingredients should you look for in products that treat adult acne and why?
When selecting products to treat adult acne, look for ingredients that target different aspects of acne formation. Salicylic acid, or beta hydroxy acid (BHA), can be found in cleansers and wipes. This is a great ingredient to look for because it can penetrate deep into the pores to exfoliate and clear out excess oil and dead skin cells, thereby preventing the formation of new acne lesions and reducing inflammation. Another ingredient is Benzoyl Peroxide, found in cleansers, creams and serums, which helps to kill acne-causing bacteria (Propionibacterium acnes) on the skin’s surface and within the pores. It also helps to reduce excess oil and inflammation.
Retinoids help promote cell turnover, prevent clogged pores, and reduce inflammation. They also help to improve skin texture and tone, which can be beneficial for preventing and treating comedones and post-acne hyperpigmentation. Niacinamide is another ingredient that helps to reduce inflammation and redness, regulates oil production, and improves skin barrier function. It also has brightening properties to help with post-inflammatory hyperpigmentation and can be found in moisturizers, serums, and creams. Another ingredient is Alpha Hydroxy Acids (AHAs) like Glycolic Acid and Lactic Acid, which are present in toners and peels that exfoliate the skin’s surface to remove dead skin cells and improve skin texture. AHAs also stimulate collagen production and can help fade acne scars. All exfoliating products, although helpful, should be used with caution so as not to over dry the skin, which can lead to more break outs.
What kinds should you avoid and why?
Avoiding certain ingredients and product types that can exacerbate the condition when treating adult acne is essential. Some key ingredients to avoid include heavy oils and butters, which can clog pores and lead to more breakouts. Avoid alcohol and fragrance-based products because they can strip the skin of natural oils. This can increase oil production and potential irritation and dryness, worsening acne. Avoid harsh physical exfoliants such as apricot kernel scrubs or walnut shell powders as they can cause microtears in the skin, leading to irritation, inflammation, and worsening of acne. Additionally, high-glycemic index (GI) Ingredients can spike insulin levels, which may increase oil production and inflammation, leading to acne. Using excessively rich or heavy creams such as night or anti-aging products can also clog pores and lead to breakouts.
What are some of your favorite products for adult acne?
I recommend La Roche-Posay’s Effaclar Gel Facial Wash as a cleanser because it effectively removes excess oil and helps clear and prevent breakouts without overly drying the skin. It’s gentle enough for daily use and helps to keep pores unclogged. SkinMedica’s AHA BHA Exfoliating Cleanser with alpha hydroxy acids (AHAs) or beta hydroxy acids (BHAs) is an excellent exfoliating cleanser that I like because it gently scrubs away dead skin while improving the appearance of skin tone texture and smoothness. SkinMedica’s Retinol Complex is encapsulated with PhytoShield Complex, an antioxidant complex that helps to enhance the skin texture and minimize irritation. EltaMD’s Moisture Seal is a lightweight, waterless, preservative-free moisturizer that locks in moisture for 24 hours. It applies easily and gently to avoid disturbing tender, irritated skin.
SkinMedica’s Acne Clarifying Treatment Serum is a revolutionary product for fighting acne, reducing post-acne marks, and reinforcing the skin barrier for clear, healthy-looking skin. For best results, I usually pair this product with SkinMedica’s Pore Purifying Gel Cleanser, a non-irritating gel cleanser with clinically proven ingredients that gently dissolve makeup, oil, impurities, and dirt to cleanse and purify pores while supporting the skin’s barrier and improving the appearance of skin texture.
Oil-free UV Clear SPF, 46 from EltaMD, is another product I recommend to my patients with sensitive skin types prone to discoloration and breakouts associated with acne and rosacea to help calm and protect their skin. It contains niacinamide (vitamin B3), hyaluronic acid, and lactic acid, which help promote healthy-looking skin.