IPL vs. BBL: Which is Right For Me?

IPL vs BBL: Which Light-Based Treatment Is Right for Your Skin?

If you’ve been exploring options for clearer, more even-toned skin, you’ve likely come across IPL and BBL. While these light-based treatments are often mentioned in the same breath, they’re not interchangeable, and understanding the difference can help you make the best choice for your skin concerns.

ipl vs bbl

What Is IPL?

IPL, or Intense Pulse Light, uses broad-spectrum light energy to target common skin issues like sun damage, brown spots, redness, and uneven tone. It’s a versatile treatment that’s been around for years and has helped countless patients achieve more radiant skin.

IPL is particularly well-suited for patients dealing with mild to moderate discoloration who are looking for gradual improvement over time.

What Is BBL?

BBL, or BroadBand Light, takes light therapy to the next level. This advanced technology delivers energy more precisely and consistently than traditional IPL, allowing it to address more stubborn or deep-seated concerns.

BBL can effectively treat deeper sun damage, persistent redness, broken capillaries, and even improve overall skin texture and quality. Beyond correction, BBL is also recognized for its rejuvenating and anti-aging benefits by stimulating collagen production and supporting long-term skin health, making it a favorite among patients focused on prevention and maintenance. There is also a customization specifically to target acne. The BBL acne protocol can reduce acne-causing bacteria, calm inflammation, and improve overall skin clarity.

So Which Treatment Is Right for You?

Choosing between IPL and BBL really comes down to your specific skin goals and concerns.

IPL may be ideal if you:

  • Are new to laser or light-based treatments
  • Have mild sun spots or redness
  • Prefer subtle, progressive results
  • Are looking for ongoing maintenance treatments

BBL may be the better choice if you:

  • Have more significant sun damage or redness
  • Want faster, more noticeable results
  • Are focused on anti-aging and improving overall skin quality
  • Are committed to long-term corrective treatments

The Bottom Line

Both IPL and BBL are proven, effective treatments, there’s no one-size-fits-all answer. The right choice depends on your unique skin type, concerns, and aesthetic goals. That’s why a personalized consultation is so important. During your visit, we can assess your skin, discuss your expectations, and recommend the treatment that will deliver the best, safest results for you.


Dandruff Explained: Causes, Treatments, and Products | As Seen in HuffPost

Dandruff is common and often caused by a combination of factors like scalp yeast overgrowth, oil imbalance, and dry skin. Using the right ingredients and consistent care can help control flaking, itching, and irritation. If you struggle with this, discover some shampoos to add into your routine recommended by Dr. Alexandra Bowles, featured in HuffPost’s article.

dandruff

What are some of the main causes of dandruff?

Dandruff is incredibly common, and it often stems from a combination of factors rather than one single cause. One of the biggest contributors is an overgrowth of Malassezia, a yeast that naturally lives on the scalp but can become irritating when it multiplies. This irritation leads to flaking, itching, and inflammation. Dry skin, especially in colder months, can also make dandruff worse, as can excess oil production, which creates an environment where yeast thrives. Some hair products may trigger sensitivity or buildup, leading to even more irritation. Stress and changes in hormones can also play a role, which is why dandruff can flare during busy or stressful periods. Overall, dandruff is rarely about “poor hygiene.” It’s usually about how your scalp responds to oils, yeast, and environmental factors.

Are there key ingredients that people should look for when trying to treat their dandruff?

Several ingredients do a wonderful job at calming dandruff and restoring balance to the scalp. Pyrithione zinc and selenium sulfide help reduce scalp yeast, which is often the root cause of flaking and itching. Ketoconazole is another powerful antifungal option, especially for more stubborn cases. If inflammation is a big issue, salicylic acid can gently exfoliate flakes while helping other active ingredients penetrate better. And for people with sensitive skin, formulas containing tea tree oil can offer natural antimicrobial and soothing benefits. The key is choosing a shampoo that directly addresses your type of dandruff and using it consistently to keep symptoms under control.

What are some shampoos you recommend to help control symptoms?

Nizoral A-D (1% ketoconazole): This is one of my top recommendations for more persistent dandruff because ketoconazole is a strong antifungal ingredient that helps control yeast on the scalp. You have to let it sit on the scalp for it to work!

Head & Shoulders Clinical Strength: A great option for moderate to severe flaking, and it also helps calm itching and redness while restoring moisture balance.

Neutrogena T/Sal: Perfect for people with thicker scale or buildup because the salicylic acid breaks up flakes without being too harsh.

Selsun Blue: Another reliable choice that reduces inflammation and helps regulate oil production, which is especially helpful for oily or irritated scalps.

What daily habits and tips can help effectively manage dandruff and support overall scalp health?

Consistency is key when treating dandruff. Most people see the best results when they use their medicated shampoo several times a week and allow it to sit on the scalp for five minutes before rinsing. Avoiding heavy styling products can also help, since buildup can worsen flaking and irritation. If your scalp feels dry, pairing your dandruff shampoo with a gentle, hydrating conditioner on the ends of your hair, not the scalp, can keep hair soft without disrupting treatment. Managing stress, getting adequate sleep, and maintaining a healthy diet can also support overall scalp health. And if your flaking doesn’t improve after a few weeks, or if you notice redness, pain, or hair shedding, it’s a good idea to see a dermatologist to rule out another condition. My biggest message is that dandruff is very treatable. You just need the right approach and a little patience.

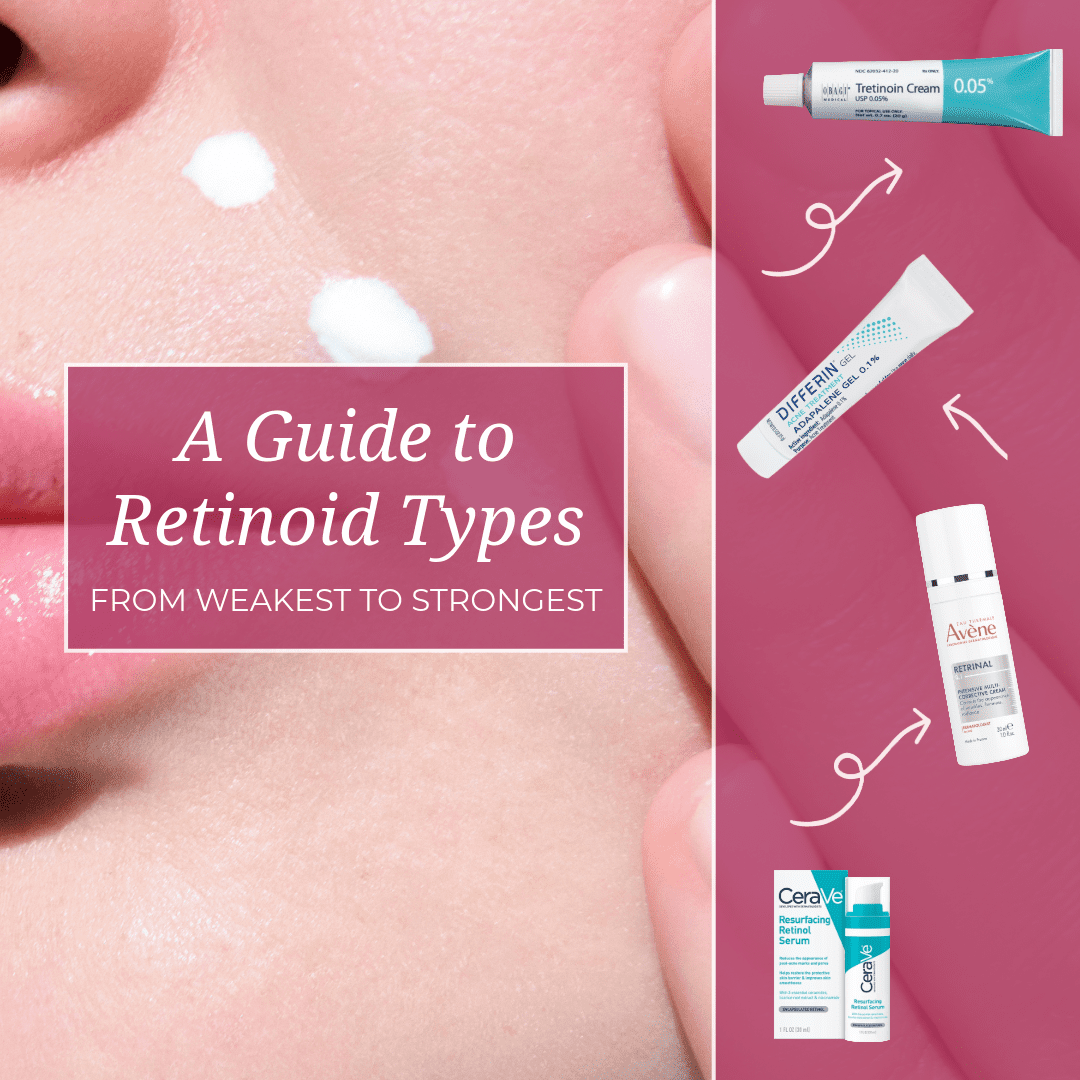
A Guide to Retinoid Types | From Weakest to Strongest

Between ‘retinol’, ‘retinal’, and ‘retinoid’, it’s easy to get confused. Let’s break down the four main categories of retinoids so you can finally understand which one is right for your skin.

There are four main types of retinoids available:

  1. Retinol: Over-the-counter, needs to convert twice in your skin
  2. Retinal: Over-the-counter, needs to convert once in your skin
  3. Over-The-Counter Prescription Strength: Like Differin, no conversion needed
  4. Prescription Only: Like Tretinoin, the strongest option

The key difference between these four categories is how many steps it takes for them to become active in your skin. Fewer conversion steps means faster and stronger results, but also more potential for irritation.

retinoids

Category 1: Retinol 

Retinol,  spelled with an ‘o’, is what you’ll find at drugstores, Sephora, and most skincare counters. It’s the most common and beginner-friendly option for good reason.

How Retinol Works: Your skin has to convert retinol twice before it becomes retinoic acid, the active form that actually improves your skin. This double conversion makes it slower-acting but also much gentler on your skin.

Available Strengths:

  • 0.1% to 0.3% – Beginner strength
  • 0.5% – Intermediate strength
  • 1% – Maximum over-the-counter strength

Best For:

  • Complete beginners to retinoids
  • Sensitive or dry skin types
  • Anti-aging prevention
  • Anyone wanting a gentle introduction

Results Timeline: Expect to wait 12-16 weeks before seeing noticeable results.

Example Products: SkinMedica’s Retinol Complex, La Roche-Posay Retinol B3, The Ordinary Retinol, CeraVe Resurfacing Retinol Serum, RoC Retinol Correxion

Category 2: Retinal/Retinaldehyde 

Retinal, spelled with an ‘a’ and also called retinaldehyde, is newer but quickly becoming a favorite among skincare enthusiasts.

How RetinAL Works: Retinal only needs to convert once in your skin before becoming active retinoic acid. This single conversion means it works much faster than retinol. Studies suggest it can be up to 11 times more effective than retinol at the same concentration.

Available Strengths: 0.05% to 0.1%

Best For:

  • People who’ve already used retinol successfully
  • Anyone wanting faster results without a prescription
  • The middle ground between over-the-counter retinol and prescription strength

Results Timeline: You might see improvements in 6-8 weeks instead of 12-16.

Example Products: Avène Retrinal Intensive Multi-Corrective Cream, Avène Retrinal Advanced Correcting Serum, Geek & Gorgeous A-Game, Medik8 Crystal Retinal,

Category 3: Over-The-Counter Prescription Strength 

These retinoids used to require a prescription but are now available over-the-counter. The most common is Adapalene, sold under the brand name Differin.

How OTC Retinoids Work: Adapalene is already in its active form, no conversion needed. Your skin can use it immediately, which is why it works faster than retinol.

Available Strength: 0.1% over-the-counter (0.3% requires prescription)

Best For:

  • Acne and clogged pores specifically
  • People who want retinoid strength without seeing a doctor
  • Anyone who wants to level-up the results they’re seeing from their current retinol or retrinal

Results Timeline: Expect to see improvements in 8-12 weeks, particularly for acne.

Key Difference: This is technically a retinoid, not a retinol. It’s chemically different and works differently in your skin. Adapalene is particularly effective at unclogging pores and reducing inflammation, making it especially popular for acne treatment.

Example Products: Differin Gel, La Roche-Posay Effaclar Adapalene Gel

Category 4: Prescription Only Retinoids 

Prescription retinoids are the strongest options available and require a doctor’s prescription for good reason.

Main Types

Tretinoin (Retin-A):

  • Available in 0.025%, 0.05%, 0.1%
  • Pure retinoic acid that works immediately
  • Most studied and proven effective

Adapalene 0.3% (Prescription-strength Differin):

  • Three times stronger than OTC version
  • Used for moderate to severe acne

Tazarotene

  • Available in 0.05% and 0.1%
  • Incredibly effective but can cause the most irritation

How Prescription Retinoids Work: These are pure retinoic acid or active retinoids. No conversion needed, they get to work immediately in your skin.

Best For:

  • Stubborn acne that hasn’t responded to OTC treatments
  • Significant sun damage or deep wrinkles
  • When over-the-counter options haven’t worked after 3-4 months
  • Anyone wanting the fastest, most dramatic results

Results Timeline: You may see improvements in as little as 4-8 weeks.

Key Differences:

  • Much more potent than anything over-the-counter
  • Can cause more irritation initially (dryness, redness, peeling)
  • Shows results faster
  • Requires monitoring by a dermatologist
  • Often more affordable with insurance


The Key Differences at a Glance

Type Conversions Needed Speed Strength Availability
Retinol 2 conversions Slowest Gentlest Drugstore/Online
Retinal 1 conversion Faster Moderate Drugstore/Online
OTC Retinoids 0 conversions Fast Strong Drugstore/Online
Prescription 0 conversions Fastest Strongest Doctor required

The fewer conversion steps required, the faster and stronger the results, but also the higher the potential for irritation.

Which One is Right for You?

Try Retinol if:

  • You’re brand new to retinoids
  • You have sensitive, dry, or reactive skin
  • You want gentle anti-aging prevention
  • You’re nervous about irritation
  • You prefer starting slow and building up

Choose Retinal if:

  • You’ve successfully used retinol before
  • You want faster results without seeing a doctor
  • You’re looking for a middle-ground option
  • You’re impatient with retinol’s slow timeline
  • You want to try something newer and more advanced

Try Over-the-Counter Retinoids if:

  • You’re primarily dealing with acne
  • You want stronger results without a prescription
  • Retinol hasn’t worked well for you after several months
  • You need something that targets clogged pores
  • You want proven acne treatment without the doctor visit

Choose Prescription Retinoids if:

  • You have severe acne or significant sun damage
  • OTC options haven’t worked after 3-4 months of consistent use
  • You want the fastest, most dramatic results
  • You’re willing to deal with more initial irritation
  • You have access to a dermatologist
  • You want the most researched and proven option

Important Tips for All Retinoid Users

Regardless of which category you choose, follow these essential guidelines:

  • Start Low and Slow: Begin with the lowest strength available in your chosen category. Use it 2-3 times per week initially, then gradually increase frequency as your skin adjusts.
  • Be Patient: Don’t expect overnight results. Even prescription retinoids take several weeks to show improvements. OTC retinol can take 12-16 weeks. Stick with it.
  • Always Wear Sunscreen: All retinoids increase sun sensitivity. Daily SPF 30 or higher is non-negotiable.
  • Expect Some Adjustment: Mild dryness, flaking, or redness in the first few weeks is normal with any retinoid. This is often called the ‘retinization’ period. It usually improves after 2-4 weeks.
  • Don’t Use If Pregnant: Retinoids are not safe during pregnancy or breastfeeding. Talk to your doctor about safe alternatives.
  • Apply to Dry Skin: Wait a few minutes after cleansing before applying your retinoid. This minimizes irritation.
  • Less Is More: A pea-sized amount is enough for your entire face. More product doesn’t mean better results.

The ‘best’ retinoid isn’t necessarily the strongest one – it’s the one you’ll actually use consistently without excessive irritation. A gentler retinoid you use every night is infinitely better than a strong prescription retinoid that sits unused in your cabinet because it irritates your skin too much. Don’t obsess over finding the ‘perfect’ retinoid. Just start somewhere appropriate for your experience level and stick with it. Consistency beats strength every single time. Your skin will thank you for taking the gentle, patient approach, even if it takes a little longer to see results.

Platysma Botox: New Non-Surgical Neck Rejuvenation

In a new advancement for aesthetic medicine, the FDA has approved Botox for the vertical bands connecting the jaw and neck. This area is more commonly known as the platysma bands. Announced in October 2024, this is Botox’s first approved use beyond the face, expanding its application to the neck area. 

The platysma is a thin, superficial muscle that extends from the chest up to the lower face. Over time, repetitive muscle activity and aging can cause this muscle to become more prominent. This can lead to visible vertical bands on the neck and a less defined jawline. 

platysma botox

This breakthrough allows providers to offer a non-surgical, injectable option for patients concerned about neck aging and looking for a treatment to fight the signs. “With the neck being in the top 3 areas that age you most, this is a great tool in our toolbox to continue to help with a natural, graceful aging approach,” adds Anna Lunning, CNP.

The treatment involves precise injections to the vertical bands on the neck. This temporarily relaxes the underlying muscles to reduce their appearance. Depending on the patient, the amount of units ranges from 8-16, which equates to around 4 units per band. Patients typically see improvements within two weeks, with results lasting approximately three months. 

platysma botox

This development provides patients with more comprehensive options for addressing signs of aging. It also extends the benefits of Botox treatments beyond the face to include the neck and jawline.

If you’re ready to explore this exciting new treatment and achieve a smoother, more youthful neckline, schedule your appointment today! We’re here to help you age gracefully, from face to neck.


Dry Scalp Solutions: Hydration Tips That Work | As Seen in Glamour

A dry scalp isn’t just uncomfortable, it’s often your skin’s way of asking for help. Whether it’s due to your environment, hair care routine, or skin barrier health, learning how to properly keep your scalp hydrated can make a world of difference in both comfort and hair health. Learn more from Dr. Alexandra Bowles in Glamour’s article.

How can you hydrate your scalp?

A dry scalp is often a sign that your skin barrier needs a little extra support. Luckily, there are several simple steps that can make a big difference. I usually recommend starting with a gentle, hydrating shampoo. Look for one with calming ingredients like aloe, glycerin, or oat extract to help soothe irritation while moisturizing the scalp. Avoid washing with hot water, as it can strip your scalp of its natural oils. Instead, opt for lukewarm water to cleanse effectively without over-drying.

Scalp exfoliation is another great step. Massaging with your fingertips or using a soft brush once or twice a week can help remove dead skin so hydrating treatments can absorb more deeply. I also love scalp masks or serums with nourishing oils like jojoba or squalane. They provide targeted moisture right where it’s needed most. And don’t forget internal hydration: drinking plenty of water and eating water-rich foods like cucumbers and watermelon can also help support scalp health from the inside out.

How do you get rid of dry scalp?

Getting rid of a dry scalp begins with taking a closer look at your hair care routine. I always tell my patients to pay attention to how their scalp feels between washes. If you’re washing too often or not often enough, it can throw off the scalp’s natural balance. Using a hydrating scalp treatment a few times a week can make a big difference, especially when it includes ingredients like hyaluronic acid for moisture and niacinamide to help restore a healthy skin barrier. Be sure to choose shampoos that are sulfate-free and gentle, so they cleanse without stripping the scalp of its natural oils. And while hot showers may feel comforting, washing with lukewarm water helps prevent further dryness or irritation.

It’s also important to consider your environment and overall wellness, such as protecting your scalp from cold, dry air with a breathable hat and supporting hydration from within by drinking plenty of water and incorporating skin-friendly nutrients like omega-3s and vitamins A, B, and C into your diet.

scalp hydration

Does conditioner moisturize your scalp?

Conditioner is primarily designed to hydrate and soften the hair shaft, not the scalp itself. That said, some conditioners with nourishing ingredients like glycerin, panthenol, or aloe can provide light moisture to the scalp. However, it’s important to choose formulas that are non-comedogenic and free of heavy silicones or fragrances, especially if you’re prone to scalp buildup or sensitivity. I usually recommend focusing conditioner on the mid-lengths and ends of the hair. If the scalp is feeling particularly dry, a light, scalp-safe conditioner can offer temporary relief. Just be sure to rinse thoroughly and follow with a targeted scalp treatment if deeper hydration is needed.

How do dermatologists moisturize their scalps?

As dermatologists, we look for evidence-based solutions that address both the cause and the symptoms of dryness. Depending on what’s going on, we may recommend treatments like medicated shampoos, topical corticosteroids, or hydrating serums. This may depend on whether it’s seasonal dryness, eczema, or product-related irritation. For more routine dryness, I often suggest lightweight scalp oils or leave-in treatments that restore moisture without clogging follicles. We also focus on preserving the scalp’s barrier by avoiding harsh products and encouraging regular, gentle exfoliation. Every scalp is different, so our approach is always tailored to the patient’s specific needs and skin type.

How can you moisturize the scalp naturally?

There are several gentle, natural ways to support scalp moisture that I often recommend to patients who prefer a more holistic approach. Natural oils, such as jojoba, coconut, or argan, can be massaged into the scalp to help lock in hydration. Just make sure to patch-test first and wash thoroughly to avoid buildup. Aloe vera is another great option, especially for soothing dry, irritated areas. Staying well-hydrated and eating a diet rich in omega-3 fatty acids, zinc, and vitamins A and E can also support scalp health from the inside out. And don’t forget: consistency is key. Natural remedies work best when used regularly and paired with a gentle, non-stripping haircare routine.

What causes a dry or irritated scalp?

A dry or irritated scalp can come from a number of different sources, and often, it’s a mix of factors working together. Things like over-washing, product buildup, or using shampoos that are too harsh can strip away the scalp’s natural oils and throw off its balance. Cold weather, indoor heating, or excessive sun exposure can also cause moisture loss from the scalp, leaving it dry and uncomfortable. I also remind my patients that hydration and nutrition play a role. When your body’s dehydrated or missing key nutrients, your scalp can be one of the first places it shows. Some people are simply more prone to dryness due to genetic factors or underlying conditions such as eczema or psoriasis. If the dryness persists or becomes uncomfortable, it’s a good idea to see a board-certified dermatologist who can help pinpoint the cause and guide you toward the right treatment.

Does hair texture and type impact scalp dryness?

Yes, your hair texture and type can absolutely influence how dry your scalp feels. For example, curly and coily hair types tend to be drier overall because natural oils from the scalp have a harder time traveling down the hair shaft. People with finer or straighter hair may notice dryness more quickly if they’re over-washing or using products that strip the scalp. I always remind patients that their hair and scalp require a routine tailored to their unique biology. There’s no one-size-fits-all approach. Paying attention to how your scalp feels between washes is a helpful first step.

Do certain products impact scalp dryness?

Yes, and sometimes it’s the products we use every day that quietly contribute to scalp issues. Harsh shampoos with sulfates, heavy dry shampoos, or alcohol-based styling products can strip the scalp of its natural oils, leading to dryness and irritation. Even using the wrong shampoo for your hair type can throw off your scalp’s balance. I encourage patients to read labels and look for words like “hydrating,” “soothing,” or “moisture-replenishing.” A gentle, balanced product can make a big difference in how your scalp feels.

What products do you recommend for helping with hydration? 

There are several products I often recommend for hydrating the scalp. Look for serums or treatments that contain ingredients like hyaluronic acid, aloe vera, or niacinamide. These support both moisture and a healthy scalp barrier. Brands like Nécessaire ($45), Philip Kingsley Density Preserving Serum ($67), and Living Proof Dry Scalp Treatment ($38) all offer well-formulated scalp treatments that are gentle yet effective. If you’re experiencing ongoing dryness, a scalp-specific mask like Yobee Restorative Scalp Mask ($42) or SheaMoisture Pre-Wash Masque ($10), used once a week, can also help rebalance things. And as always, choosing a moisturizing shampoo without sulfates is a great foundation for healthy scalp care.


How Braids Can Affect Hair and Scalp Health | As Seen in Byrdie

While braids can be a great protective styling option, it’s important to understand how they can impact the health of your hair and scalp. Learn how to take extra precautions to avoid any damage to your scalp or hair with Dr. Alexandra Bowles in Byrdie’s article.

scalp health

Watch out for flaking or itching:

While some mild flaking can be expected, persistent itching or visible flakes under your braids might be a sign of scalp irritation or even contact dermatitis. If you notice these signs, don’t ignore them. I recommend using a gentle, alcohol-free shampoo or even a medicated shampoo in a diluted form to spot-treat the area. Listening to your scalp early on helps prevent things from progressing into full-blown inflammation or infection. Speak to your dermatologist to see if this is the right treatment for you!

Don’t skip nighttime scalp protection:

We often focus on protecting the braids themselves at night, but your scalp needs love, too. Cotton pillowcases can pull moisture from your scalp and even cause friction that irritates already-stressed areas. I suggest wearing a silk or satin scarf or bonnet and, if possible, using a silk pillowcase for extra protection. If your scalp feels dry before bed, a quick mist of a lightweight, hydrating scalp tonic can work wonders overnight.

Be gentle during takedown:

How you remove your braids matters just as much as how you install them. Too many people rush the takedown process, which can lead to unnecessary breakage and even scalp irritation. I always advise patients to detangle gently as they go, using a detangling spray or conditioner to soften buildup, and never force out a tangle. Taking your time during removal gives your hair and scalp a much-needed reset and prevents long-term damage.

scalp health

Keep an eye on the nape of your neck:

The nape area is often overlooked, but it’s actually one of the most sensitive spots on your scalp. Braids that are too heavy or too tight in this area can lead to breakage. Over time, this could even result in small bald patches. If you’re getting longer braids or twists, I recommend asking your stylist to use less tension. Especially on the nape, make sure to avoid loading with extra weight. Protecting this zone can make a big difference in the overall health of your hair.

Give your scalp a break:

Wearing tight braids or other hairstyles that are tightly pulled back for long periods of time can actually damage the hair follicles and lead to a condition known as traction alopecia. I counsel patients to try to stick to loose braid styles or at least taking a break in-between braid hairstyles to give your scalp time to recover. If you notice your hairline thinning or receding, this could be from the braids pulling on scalp and can cause permanent hair loss.

All About Polyhydroxy Acids | As Seen in Byrdie

If you’re looking for a gentle way to exfoliate, hydrate, and strengthen your skin, polyhydroxy acids (PHAs) might be what your skincare routine is missing! Learn all about them with Dr. Alexandra Bowles in Byrdie’s recent article.

polyhydroxy acid

What is PHA?

Polyhydroxy acids, or PHAs, are often described as the “entry-level” chemical exfoliant, and for good reason. Their larger molecular size means they sit closer to the surface of the skin. This allows them to gently loosen dead skin cells without penetrating too deeply or causing irritation. What’s exciting about PHAs is that they’re not just exfoliators. They also act as antioxidants and hydrators, making them a triple win for anyone looking to brighten and smooth their skin without the sting. If you’ve struggled with AHAs or BHAs in the past, PHAs might be the ideal way to experience the benefits of chemical exfoliation more comfortably.

What are some benefits of PHA?

One of the more underrated benefits of PHAs is their ability to support the skin’s natural barrier. While some acids can leave skin feeling stripped or overly tight, PHAs help maintain hydration levels and actually promote a stronger, healthier skin barrier over time. They also work well alongside calming ingredients, which makes them a fantastic option for those managing redness, rosacea, or even eczema. And because they exfoliate without increasing sun sensitivity as much as AHAs, PHAs can be more forgiving for year-round use, though sunscreen is still a must!

What’s the difference between AHA, BHA, and PHA?

AHAs, like glycolic and lactic acid, exfoliate the skin’s surface and are great for dullness and uneven tone, but can be irritating. BHAs, such as salicylic acid, penetrate deeper into pores, making them ideal for oily or acne-prone skin. PHAs are larger in molecular size, so they stay on the surface and work more gently. This makes them perfect for sensitive skin or those new to acids. PHAs also have added moisturizing and antioxidant benefits, which AHAs and BHAs don’t typically offer. Overall, PHAs are more forgiving. They hydrate as they exfoliate and pair well with calming or hydrating ingredients, making them an easy choice for layered routines. 

Are there any side effects?

The beauty of PHAs is that they’re designed to minimize irritation. While other acids might cause redness or tingling, PHAs are usually well-tolerated, even by those with rosacea or eczema. That said, every skin type is unique, so I always recommend introducing them slowly and watching for any signs of sensitivity. Even though PHAs are gentle, more isn’t always better. Using them too frequently, especially alongside other exfoliants, can lead to a compromised skin barrier. If your skin starts to feel tight or begins to peel, take a break and focus on hydration and barrier repair.


One lesser-known point: even gentle acids like PHAs can interact with other actives. Using them right before or after retinoids or vitamin C may increase your chances of irritation. If you’re combining powerful ingredients, it’s best to alternate nights or seek advice from your dermatologist.

phas

Is it right for my skin? 

PHAs are one of the most skin-friendly exfoliants out there, especially for those with sensitive or compromised skin. Their gentle nature makes them a great choice for people dealing with conditions like rosacea, eczema, or post-procedure recovery. Still, I always advise patch testing first and avoiding use on areas with broken or inflamed skin. If you’re acne-prone, PHAs may not clear clogged pores as effectively as BHAs. But, they can still help improve skin texture and tone without the risk of irritation. The key is to start slow and monitor how your skin feels over time.

How do I use this in my routine?

One of the best things about PHAs is how simple they are to incorporate into your routine. I often recommend starting with a leave-on product, like a serum or hydrating toner, used two to three times a week. Because PHAs are so gentle, many people can gradually increase usage based on how their skin responds. They also layer beautifully with most skincare ingredients, including hyaluronic acid, ceramides, and even some retinoids. If you’re using a physical exfoliant or other active ingredients, though, try to space them out to avoid over-exfoliating.

Tips to Prevent Ingrown Hairs After Waxing | As Seen in Byrdie

Even after waxing, do you struggle with pesky ingrown hairs? Dr. Alexandra Bowles shares tips on how to prevent them in a recent Byrdie article.

ingrown hairs


Avoid hot showers for 24 hours after waxing:

Heat can dilate your pores and disrupt the skin’s barrier, making it easier for bacteria to enter and increasing the risk of irritation or ingrown hairs. I usually recommend sticking to lukewarm water and avoiding saunas, steam rooms, or intense workouts for at least a day. Keeping the area cool and calm really supports proper healing and helps reduce the chance of bumps or redness.

Be mindful of your hormonal cycle:

Hormonal shifts can influence how your skin responds to waxing. I’ve seen that clients who wax around their period often experience more sensitivity, inflammation, and even a higher chance of ingrown hairs. If you can, try to schedule appointments during the middle of your cycle when hormones are more balanced. It usually makes for a smoother and more comfortable experience.

ingrown hairs

Apply a cold compress right after waxing:

A cold compress can be a simple but effective way to soothe the skin, reduce inflammation, and gently shrink pores to help prevent ingrown hairs. I like to use a clean cloth with ice wrapped inside or a cold gel pack and apply it in short intervals. It really helps calm any stinging or redness right after waxing and supports a faster recovery.

Add Niacinamide to your post-wax routine:

Niacinamide, or vitamin B3, is one of my go-to ingredients for calming and strengthening the skin. It regulates oil, minimizes redness, and keeps pores clear. I often recommend lightweight formulas like The Ordinary’s Niacinamide 10% + Zinc 1% or CeraVe PM Facial Moisturizing Lotion. Both are great for sensitive skin and help the area recover without clogging pores or causing irritation.

Expert Tips for Summer Ready Skin

Everyone loves the summer weather, but it’s good to keep in mind how the sunshine can affect our skin. Longer days and warmer temperatures can do wonders for your mood, they can also bring skincare challenges—from excess oil and breakouts to sun damage and dehydration.

To help you enjoy everything summer has to offer without compromising your skin’s health, prioritize a simple, effective, and dermatologist-recommended skincare routine designed specifically for the sunny season.

summer skincare

 Step 1: Cleanser 

Summer heat means more sweat, oil, and frequent SPF reapplication; all of which can lead to clogged pores and irritation if not properly removed. To help prevent breakouts and maintain a healthy, clear complexion, it’s important to find a cleanser that works for your skin.

Whether you have dry, oily, or combination skin, a cleanser used twice daily will keep your complexion clear without over-stripping or drying it out. And if you’re not sure what’s best for your skin, take our cleanser quiz!

Recommended Product for Sensitive Skin: Avène Cleanance Hydra Cleanser

Recommended Product for Acne-prone Skin: SkinMedica AHA/BHA Exfoliating Cleanser 

cleanser

Step 2: Pigment Corrector

Summer isn’t just about UV rays, your skin is also exposed to pollution and other skin stressers. This is where pigment correctors, serums, and antioxidants come in; offering a range of powerful benefits. They can brighten dull skin, protect against sun-induced damage, and improve overall skin tone and elasticity. Some ingredients to look for include vitamin C, which is excellent for brightening the complexion and reducing pigmentation; niacinamide, known for balancing oil production and strengthening the skin barrier; and ferulic acid, which enhances the stability and effectiveness of other antioxidants.

Apply your product in the morning after cleansing, and follow with moisturizer and SPF.

Recommended Product: SkinMedica Even and Correct Advanced Brightening Treatment

serum

Recommended Product: Lumivive System

Step 3: Retinol 

Retinol is a skincare powerhouse—it helps fade dark spots, reduce fine lines, and improve skin texture. However, retinol does increase your skin’s sensitivity to the sun. To use retinol safely during the summer, start with a low concentration (around 0.25–0.5%) if you’re new to it. Make sure to apply sunscreen every morning and when first starting, only use two or three times a week, then gradually increase as tolerated. In addition, be sure you are only applying retinol at night! Retinol is light-sensitive, meaning sunlight can break it down and reduce its effectiveness.

If you notice redness or flaking, reduce the amount or combine with moisturizer to reduce irritation.

Recommended Product: SkinMedica Retinol Complex

retinol

Recommended Product for Sensitive Skin: RetrinAL Advanced Correcting Serum

Step 4: Moisturizer

High humidity can make heavy creams feel greasy on your skin. To avoid this, choose a lightweight moisturizer that provides effective hydration without clogging pores. Look for ingredients such as hyaluronic acid for deep hydration.

Apply morning and night.

Recommended Product: SkinMedica Ultra Sheer Moisturizer

moisturizer

Step 5: Sunscreen 

If you do one thing for your skin this summer, let it be sunscreen. Choose a broad-spectrum SPF 30 or higher to protect against both UVA (aging) and UVB (burning) rays. And remember, sunscreen isn’t just for beach days—apply it every morning, even if you’re indoors or it’s cloudy.

To get the most out of your sunscreen, reapply it every two hours, especially if you’re sweating or swimming (try Colorscience’s Brush-On Shield SPF 50 for easy, on-the-go re-application!). Don’t forget often-missed areas like your neck, ears, chest, and hands. If you have sensitive or acne-prone skin, choose mineral sunscreens that contain ingredients that are gentler on the skin.

If you’re not sure what to choose, check out our sunscreen quiz to find the right pick for you!

Recommended Products:Alastin HydraTint Pro Mineral Sunscreen SPF, EltaMD UV Clear SPF, SkinMedica Essential Defense Everyday Clear, Colorscience Total Protection Face Shield 

spfspfspfspf

Bonus tips for a radiant summer glow:

Stay hydrated from the inside out by drinking plenty of water throughout the day. Exfoliate gently once or twice a week using a mild exfoliant to help keep your pores clear. Don’t forget to wear protective accessories like UPF clothing, hats, sunglasses, and other clothing to add an extra layer of sun protection.

Summer skincare doesn’t have to be complicated, but it does need to be consistent. By cleansing, hydrating, protecting with SPF, you can enjoy that warm-weather glow all season long, without compromising your skin’s health.

If you’re not sure what to pick for your skincare routine, schedule a visit with one of our providers and they’ll help you customize and create a plan perfect for you!

DiamondGlow vs HydraFacial

DiamondGlow vs. HydraFacial: What’s the Difference and Which is Right for You?

When it comes to achieving radiant, healthy skin, facial treatments have come a long way. Two of the most popular options—DiamondGlow and HydraFacial—offer deep cleansing, exfoliation, and hydration, but they work in different ways and deliver unique benefits. So how do you choose the one that’s right for you? Let’s take a closer look at both treatments to help you decide.

diamondglow

What Is HydraFacial?

HydraFacial is a popular non-invasive treatment that uses a patented Vortex-Fusion technology to cleanse, extract, and hydrate the skin. The process involves multiple steps, including a gentle acid peel, painless extraction with suction, and infusion of serums tailored to your skin concerns.

HydraFacial is known for being gentle and relaxing, great for all skin types, especially those new to facials or looking for a quick refresh. It’s also a favorite for its immediate glow and lack of downtime.

What Is DiamondGlow?

DiamondGlow takes things a step further. It uses a diamond-tip wand that physically buffs away dead skin cells while delivering medical-grade serums deep into the skin. Diamond Glow exfoliates, extracts, and infuses customized serums all at the same time to plump skin by up to 70%. This no-downtime treatment is appropriate for all skin types.

The precise and personalized exfoliation sets DiamondGlow apart. You can also choose between multiple options depending on what you want to target. Options include:

  • TNS Advanced+: Visible Signs of Aging
  • HA5 Hydra Collagen: Rough, Dry Skin
  • Even & Correct Brightening: Hyperpigmentation
  • Pore Purifying: Congested Skin & Visible Redness
  • Vitamin C: Dullness & Photodamage

Which Treatment Is Best for You?

Both treatments offer great results and are safe for all skin types. If you’re looking for a gentle introduction to facials or a quick skin pick-me-up before an event, HydraFacial is a reliable choice.

However, for those who want to elevate their skincare results, especially if you’re targeting concerns like dullness, acne scars, rough texture, or sun damage, DiamondGlow’s combination of precision exfoliation and deep serum infusion offers a next-level experience.

Sometimes, that extra layer of customization and depth can make all the difference.

The Bottom Line

Choosing between DiamondGlow and HydraFacial ultimately depends on your skin goals and preferences. Both are excellent treatments, but if you’re looking to invest in something that offers deeper rejuvenation and more targeted results, DiamondGlow may just be your skin’s new best friend!