A Guide to Retinoid Types | From Weakest to Strongest

Between ‘retinol’, ‘retinal’, and ‘retinoid’, it’s easy to get confused. Let’s break down the four main categories of retinoids so you can finally understand which one is right for your skin.

There are four main types of retinoids available:

  1. Retinol: Over-the-counter, needs to convert twice in your skin
  2. Retinal: Over-the-counter, needs to convert once in your skin
  3. Over-The-Counter Prescription Strength: Like Differin, no conversion needed
  4. Prescription Only: Like Tretinoin, the strongest option

The key difference between these four categories is how many steps it takes for them to become active in your skin. Fewer conversion steps means faster and stronger results, but also more potential for irritation.
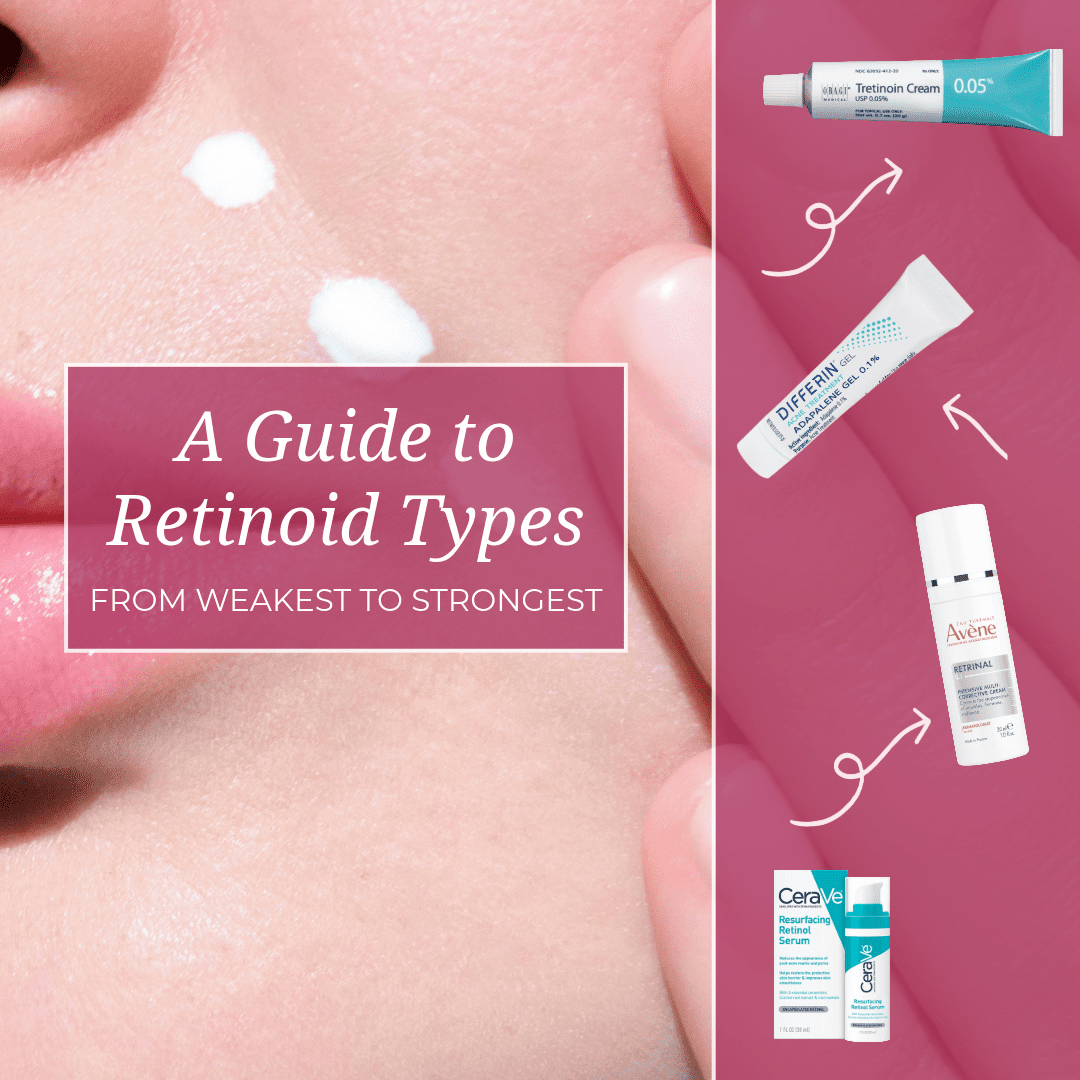
retinoids

Category 1: Retinol 

Retinol,  spelled with an ‘o’, is what you’ll find at drugstores, Sephora, and most skincare counters. It’s the most common and beginner-friendly option for good reason.

How Retinol Works: Your skin has to convert retinol twice before it becomes retinoic acid, the active form that actually improves your skin. This double conversion makes it slower-acting but also much gentler on your skin.

Available Strengths:

  • 0.1% to 0.3% – Beginner strength
  • 0.5% – Intermediate strength
  • 1% – Maximum over-the-counter strength

Best For:

  • Complete beginners to retinoids
  • Sensitive or dry skin types
  • Anti-aging prevention
  • Anyone wanting a gentle introduction

Results Timeline: Expect to wait 12-16 weeks before seeing noticeable results.

Example Products: SkinMedica’s Retinol Complex, La Roche-Posay Retinol B3, The Ordinary Retinol, CeraVe Resurfacing Retinol Serum, RoC Retinol Correxion

Category 2: Retinal/Retinaldehyde 

Retinal, spelled with an ‘a’ and also called retinaldehyde, is newer but quickly becoming a favorite among skincare enthusiasts.

How RetinAL Works: Retinal only needs to convert once in your skin before becoming active retinoic acid. This single conversion means it works much faster than retinol. Studies suggest it can be up to 11 times more effective than retinol at the same concentration.

Available Strengths: 0.05% to 0.1%

Best For:

  • People who’ve already used retinol successfully
  • Anyone wanting faster results without a prescription
  • The middle ground between over-the-counter retinol and prescription strength

Results Timeline: You might see improvements in 6-8 weeks instead of 12-16.

Example Products: Avène Retrinal Intensive Multi-Corrective Cream, Avène Retrinal Advanced Correcting Serum, Geek & Gorgeous A-Game, Medik8 Crystal Retinal,

Category 3: Over-The-Counter Prescription Strength 

These retinoids used to require a prescription but are now available over-the-counter. The most common is Adapalene, sold under the brand name Differin.

How OTC Retinoids Work: Adapalene is already in its active form, no conversion needed. Your skin can use it immediately, which is why it works faster than retinol.

Available Strength: 0.1% over-the-counter (0.3% requires prescription)

Best For:

  • Acne and clogged pores specifically
  • People who want retinoid strength without seeing a doctor
  • Anyone who wants to level-up the results they’re seeing from their current retinol or retrinal

Results Timeline: Expect to see improvements in 8-12 weeks, particularly for acne.

Key Difference: This is technically a retinoid, not a retinol. It’s chemically different and works differently in your skin. Adapalene is particularly effective at unclogging pores and reducing inflammation, making it especially popular for acne treatment.

Example Products: Differin Gel, La Roche-Posay Effaclar Adapalene Gel

Category 4: Prescription Only Retinoids 

Prescription retinoids are the strongest options available and require a doctor’s prescription for good reason.

Main Types

Tretinoin (Retin-A):

  • Available in 0.025%, 0.05%, 0.1%
  • Pure retinoic acid that works immediately
  • Most studied and proven effective

Adapalene 0.3% (Prescription-strength Differin):

  • Three times stronger than OTC version
  • Used for moderate to severe acne

Tazarotene

  • Available in 0.05% and 0.1%
  • Incredibly effective but can cause the most irritation

How Prescription Retinoids Work: These are pure retinoic acid or active retinoids. No conversion needed, they get to work immediately in your skin.

Best For:

  • Stubborn acne that hasn’t responded to OTC treatments
  • Significant sun damage or deep wrinkles
  • When over-the-counter options haven’t worked after 3-4 months
  • Anyone wanting the fastest, most dramatic results

Results Timeline: You may see improvements in as little as 4-8 weeks.

Key Differences:

  • Much more potent than anything over-the-counter
  • Can cause more irritation initially (dryness, redness, peeling)
  • Shows results faster
  • Requires monitoring by a dermatologist
  • Often more affordable with insurance


The Key Differences at a Glance

Type Conversions Needed Speed Strength Availability
Retinol 2 conversions Slowest Gentlest Drugstore/Online
Retinal 1 conversion Faster Moderate Drugstore/Online
OTC Retinoids 0 conversions Fast Strong Drugstore/Online
Prescription 0 conversions Fastest Strongest Doctor required

The fewer conversion steps required, the faster and stronger the results, but also the higher the potential for irritation.

Which One is Right for You?

Try Retinol if:

  • You’re brand new to retinoids
  • You have sensitive, dry, or reactive skin
  • You want gentle anti-aging prevention
  • You’re nervous about irritation
  • You prefer starting slow and building up

Choose Retinal if:

  • You’ve successfully used retinol before
  • You want faster results without seeing a doctor
  • You’re looking for a middle-ground option
  • You’re impatient with retinol’s slow timeline
  • You want to try something newer and more advanced

Try Over-the-Counter Retinoids if:

  • You’re primarily dealing with acne
  • You want stronger results without a prescription
  • Retinol hasn’t worked well for you after several months
  • You need something that targets clogged pores
  • You want proven acne treatment without the doctor visit

Choose Prescription Retinoids if:

  • You have severe acne or significant sun damage
  • OTC options haven’t worked after 3-4 months of consistent use
  • You want the fastest, most dramatic results
  • You’re willing to deal with more initial irritation
  • You have access to a dermatologist
  • You want the most researched and proven option

Important Tips for All Retinoid Users

Regardless of which category you choose, follow these essential guidelines:

  • Start Low and Slow: Begin with the lowest strength available in your chosen category. Use it 2-3 times per week initially, then gradually increase frequency as your skin adjusts.
  • Be Patient: Don’t expect overnight results. Even prescription retinoids take several weeks to show improvements. OTC retinol can take 12-16 weeks. Stick with it.
  • Always Wear Sunscreen: All retinoids increase sun sensitivity. Daily SPF 30 or higher is non-negotiable.
  • Expect Some Adjustment: Mild dryness, flaking, or redness in the first few weeks is normal with any retinoid. This is often called the ‘retinization’ period. It usually improves after 2-4 weeks.
  • Don’t Use If Pregnant: Retinoids are not safe during pregnancy or breastfeeding. Talk to your doctor about safe alternatives.
  • Apply to Dry Skin: Wait a few minutes after cleansing before applying your retinoid. This minimizes irritation.
  • Less Is More: A pea-sized amount is enough for your entire face. More product doesn’t mean better results.

The ‘best’ retinoid isn’t necessarily the strongest one – it’s the one you’ll actually use consistently without excessive irritation. A gentler retinoid you use every night is infinitely better than a strong prescription retinoid that sits unused in your cabinet because it irritates your skin too much. Don’t obsess over finding the ‘perfect’ retinoid. Just start somewhere appropriate for your experience level and stick with it. Consistency beats strength every single time. Your skin will thank you for taking the gentle, patient approach, even if it takes a little longer to see results.
Identifying and Treating Fire Ant Bites | As Seen in USA Today

Fire ant bites can be painful, itchy, and alarming if you’re not sure what to expect. In this USA Today feature, board-certified dermatologist Dr. Alexandra Bowles explains how to recognize, treat, and prevent these pesky bites.

What do fire ant bites look like?

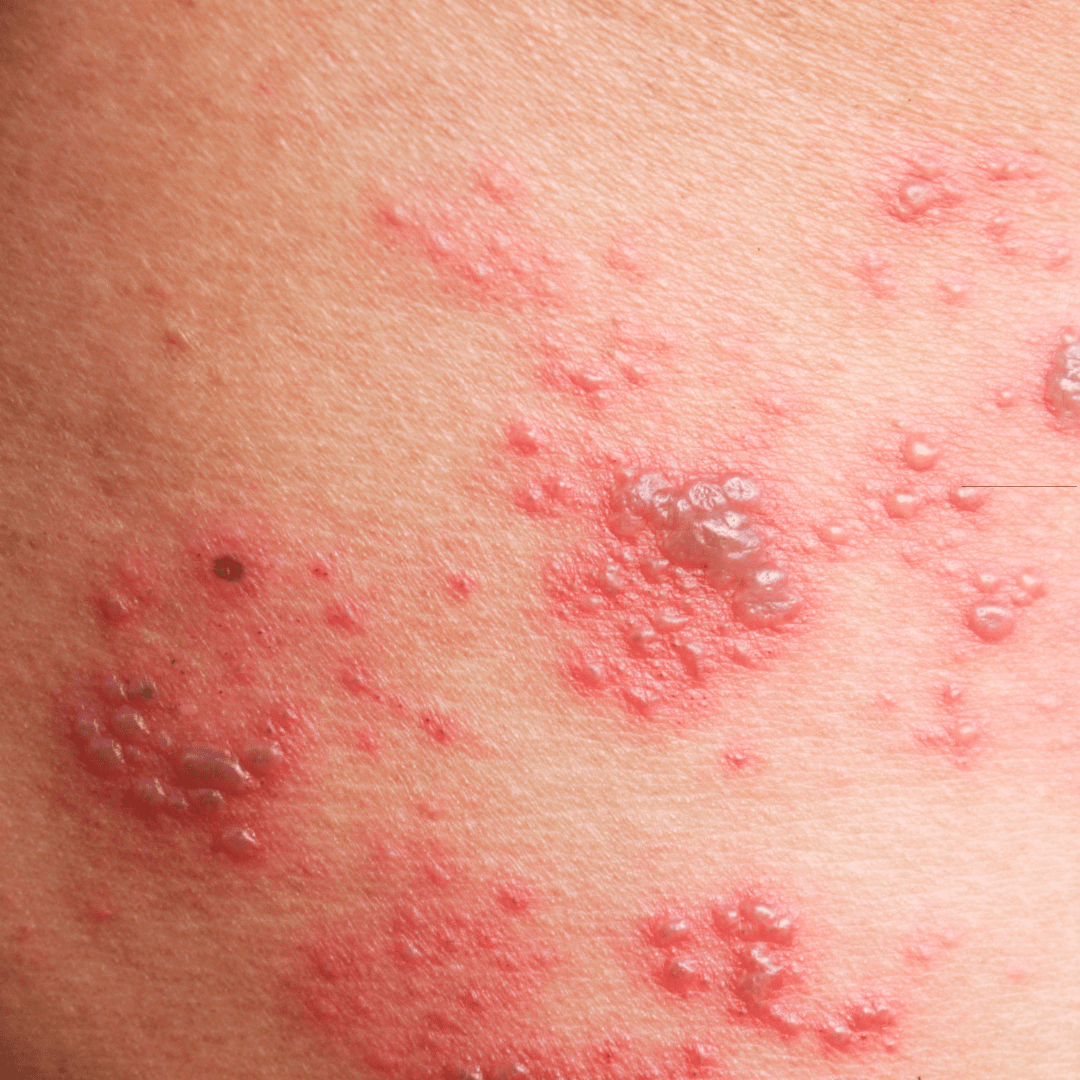
Fire ant bites usually appear as small, red bumps that quickly turn into raised, pus-filled blisters. They often appear in clusters since fire ants bite multiple times in the same area. These blisters can feel very itchy or tender and generally look more inflamed than a typical insect bite.

Fire Ant Bites

What are the symptoms or potential issues that could arise with fire ant bites?

Most people experience redness, swelling, and itching for several days. In some cases, allergic reactions can develop, including hives, dizziness, or difficulty breathing, which requires immediate medical attention. Scratching the blisters can also lead to infection, so keeping the area clean is important.

How do you treat fire ant bites, and when should you seek professional help?

Simple at-home care often helps. Wash the area gently with soap and water, apply a cool compress, and use hydrocortisone cream or an oral antihistamine to reduce itching and swelling. Avoid scratching, which can increase the risk of infection. Seek medical attention if redness spreads, purulent drainage develops, or if any systemic symptoms such as swelling of the lips or difficulty breathing occur.

Do you have any other advice for people who may be dealing with or trying to prevent these bites?

Prevention is key to avoiding fire ant bites. Wearing protective clothing, using insect repellent, and checking your skin after spending time outdoors can lower your risk. Most bites are uncomfortable but not dangerous and improve with simple care. If a bite looks unusual, worsens instead of healing, or comes with systemic symptoms, contact a healthcare professional. 


If you’re concerned you may be experiencing symptoms of fire ant bites, book an appointment today to receive expert care and relief from our providers!


Treatment-Resistant Alopecia Areata | As Seen in Everyday Health

Navigating alopecia areata can be challenging on its own, but when the condition stops responding to standard therapies, it adds an entirely new layer of frustration and uncertainty. Board-certified dermatologist Dr. Alexandra Bowles breaks down what “treatment-resistant” really means, how patients can prepare for a productive appointment, and the steps that help ensure a clear, supportive path forward. Be sure to check out the full article in Everyday Health!

Finding Support For Treatment-Resistant Alopecia AreataHow would you define “treatment-resistant” alopecia areata?

When we describe alopecia areata as “treatment-resistant,” we’re talking about cases where the hair loss doesn’t respond to the first line evidence-based therapies. That might mean a patient has tried topical or injected corticosteroids without meaningful regrowth, or even newer options like JAK inhibitors with limited results. JAK inhibitors, short for Janus kinase inhibitors, are targeted medications that help calm the overactive immune response responsible for attacking the hair follicles. When those treatments don’t work, it doesn’t mean there’s no hope. It just means the condition is a bit more stubborn and may require a different approach. Every case of alopecia areata is unique, and so it’s important to look at the whole picture to create a plan that gives each patient the best possible chance for regrowth and confidence again.

What should someone do to prepare for an appointment with a dermatologist to discuss next steps? Would bringing a list of meds tried previously and results be helpful?

Yes. Bringing a list of treatments or medications you’ve tried, including how long you used them and what kind of response you noticed, is incredibly helpful. It gives your dermatologist a clear picture of your treatment history and helps avoid repeating things that didn’t work or caused side effects.

How can patients go about voicing their concerns with a dermatologist?

It’s important to let your dermatologist know what matters most to you. You might say something like, “My biggest concern is the patch on my scalp that’s getting larger,” or “I’m really struggling with how unpredictable the shedding has been.” Being specific helps us prioritize what to focus on during the visit, whether that’s regrowth, scalp comfort, or emotional support.

Should patients explain how alopecia areata affects their daily life—and can this information help with insurance approval?

Sharing how alopecia areata affects your confidence, social life, or daily activities gives your dermatologist a better sense of the whole picture. It is never just about your hair. It’s about how the condition affects your quality of life. This information can also be helpful for insurance documentation if we need to justify coverage for advanced therapies like JAK inhibitors. For example, someone who has lost their eyelashes may have a smaller amount of hair loss involved, but that can be detrimental to your eye health. 

Is it appropriate for patients to ask about treatments they’ve heard or read about? Do many of your patients do this?

Absolutely. Most patients have already done some research before coming in, and I welcome those questions. It opens up a great dialogue about what’s new, what’s evidence-based, and which treatments are the best fit for your particular situation.

When is it appropriate for patients to ask about participating in a clinical trial?

It’s always appropriate to ask, especially if your alopecia areata has been resistant to standard therapies. Clinical trials can offer access to promising new treatments and contribute to the growing understanding of this condition. I love it when patients take an active role in exploring every possible option.

Appointments like this can be emotional—how can patients make sure they remember the key discussion points and next steps?

I know these appointments can be emotional because alopecia areata affects so much more than just the hair. I always encourage patients to take notes or bring someone they trust to help remember key points. It’s also completely okay to pause and ask for clarification; I want my patients to leave feeling informed and supported, not overwhelmed. Summarizing what you’ve heard before you leave, like confirming the next steps or follow-up plan, can also help make sure we’re on the same page.

How can patients be sure they understand the next steps in their treatment plan?

It’s so important to leave your appointment knowing precisely what the next steps are. Before you go, take a moment to review the plan out loud with your dermatologist, something like, “So we’re starting this medication and following up in six weeks, right?” That simple recap helps confirm everyone’s on the same page. If anything feels unclear, don’t hesitate to ask for written instructions or a summary through the patient portal. I also recommend noting when to expect follow-up results or labs so you’re not left wondering. Clear communication makes the process smoother and helps you feel confident about what comes next in your treatment journey.

What other advice can you give for people dealing with treatment-resistance alopecia areata?

The most important thing I’d want patients to know is that they’re not alone. Treatment-resistant alopecia areata can be incredibly frustrating, but there are always options and new therapies emerging. Dermatology is advancing quickly in this area, and what didn’t work in the past doesn’t mean there isn’t something that will help in the future. Open, honest communication with your dermatologist is key; the more we understand your experience, your goals, and how this condition impacts your life, the better we can tailor a plan that feels right for you. Don’t be afraid to ask questions, explore new possibilities, or share how you’re feeling along the way. Managing alopecia areata is truly a partnership, and we’re here to help you every step of the way.

Identifying and Treating Tick Bites | As Seen in USA Today

Tick bites are common during outdoor seasons and can sometimes lead to infections if not handled properly. Board-certified dermatologist Dr. Alexandra Bowles shares her expert advice on what to look for, how to remove ticks safely, and when to seek care. Be sure to check out the full article in USA Today!

What do tick bites look like?

Tick bites often appear as small red bumps, sometimes with a darker center where the tick was attached. They can look like mosquito bites but are usually firmer. Some bites may develop a larger red area or a rash, including the bull’s-eye pattern associated with Lyme disease, though not every tick bite causes this rash.

Identifying and Treating Tick BitesWhat are the symptoms or potential issues that could arise with tick bites?

Tick bites can cause mild redness, swelling, or itching. The bigger concern is that ticks can transmit infections such as Lyme disease or Rocky Mountain spotted fever. Warning signs include an expanding rash, fever, fatigue, or body aches in the days or weeks following a bite.

What should someone do if they think they have a tick bite?

If you find a tick attached to your skin, remove it as soon as possible using fine-tipped tweezers, pulling straight up without twisting. You may also seek care with a dermatologist for the removal if possible. Clean the area with soap and water afterward. Keep the tick if possible, as it may help with identification. Monitor for symptoms over the next several weeks, and seek medical attention if a rash develops, fever occurs, or flu-like symptoms appear.

Do you have any other advice for people who may be dealing with or trying to prevent these bites?

Prevention is key when it comes to avoiding tick bites. Wearing protective clothing, using insect repellent, and checking your skin after spending time outdoors can lower your risk. Most bites are uncomfortable but not dangerous and improve with simple care. If a bite looks unusual, worsens instead of healing, or comes with systemic symptoms, contact a healthcare professional. 

Derm-Approved Tips for Safer Gel Manicures | As Seen in Glamour

Gel manicures have become a go-to for anyone who loves long-lasting, glossy nails that don’t chip for weeks — but are they as harmless as they seem? While their durability and shine are hard to beat, regular gel manicures can come with some hidden downsides if you’re not careful. Listen to board-certified dermatologist Dr. Mona Foad break down how gel manicures affect your nails and how to keep them healthy with proper care. Be sure to check out the full article in Glamour!

Do you get gel manicures? Why or why not?

I used to get gel manicures when they first came out, but I often felt that the gel removal process was weakening my nails. I ended up switching to SNS powder years ago and have been getting that ever since. It’s understandable why so many people love them- they offer durability, a flawless shine, and the ability to go chip-free for weeks at a time. For people who travel often or have busy schedules, the longevity of the gel can be a game-changer. I’m not against them, but I do approach them with caution and always encourage patients to understand the risks and best practices before making them a part of their routine.

What are the primary health risks or negative effects that you associate with gel manicures?

One of the biggest concerns I see with gel manicures is weakened nails. This is often caused by improper application or removal techniques, such as aggressive filing or peeling the polish off, which can strip away layers of the nail and lead to brittleness or even nail loss. There is also the issue of UV exposure, as the lamps used to cure gel polish emit concentrated UVA light linked to premature aging and DNA damage in the skin, even if the exposure is brief. As with any manicure,  infections can occur if tools aren’t sterilized properly or if cuticles are pushed back too aggressively, leaving the nail barrier vulnerable to bacteria or fungi.  Additionally, the longer exposure to acetone during the removal process can be very drying to both nails and the surrounding skin. These risks don’t mean you can’t enjoy gel manicures, but they do highlight the importance of moderation and safe practices.

What steps can you take to make gel manicures less harmful?

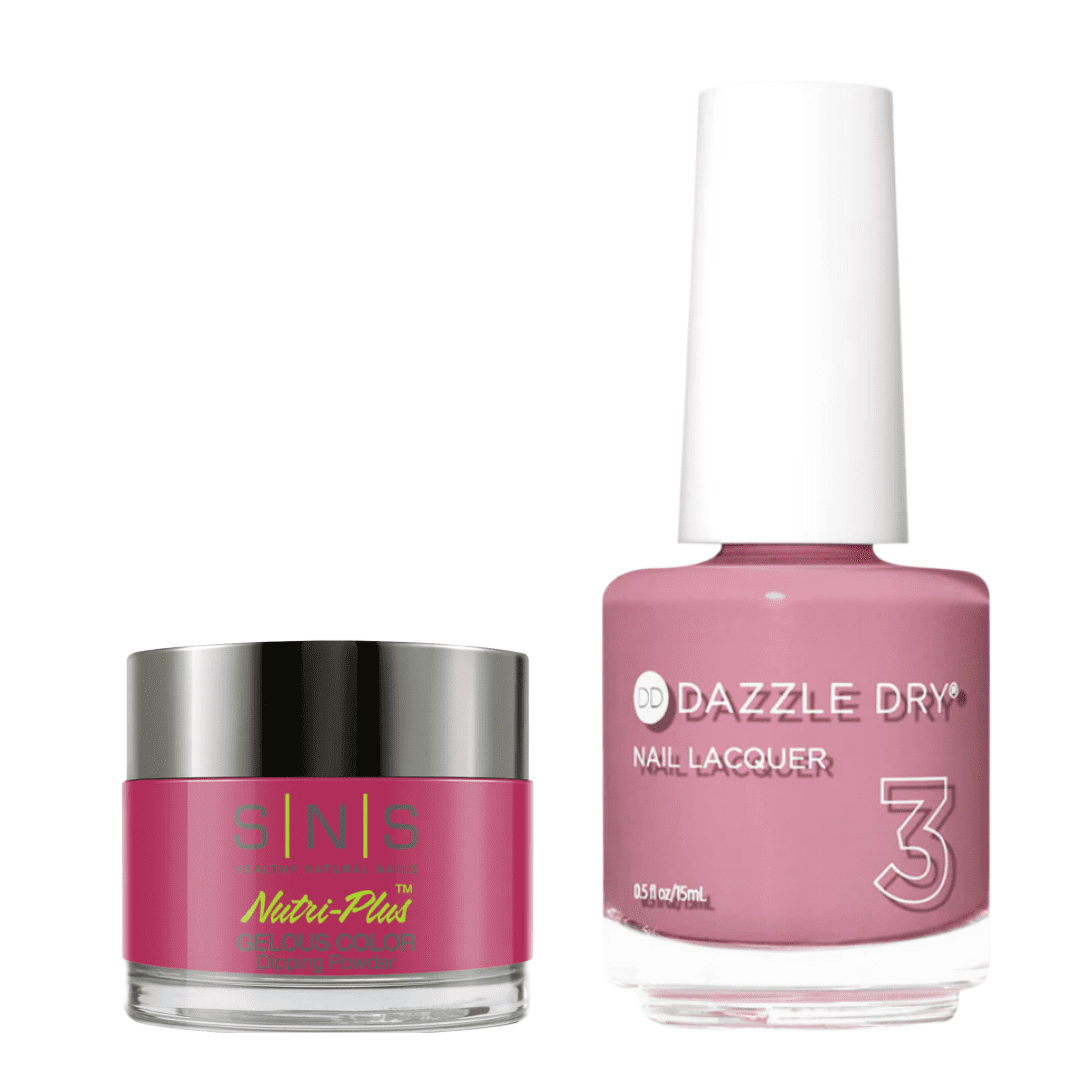
There are several ways to enjoy gel manicures more safely. Before your appointment, apply a broad-spectrum sunscreen or wear UV-protective, fingerless gloves to shield your hands from UVA exposure. During your manicure, make sure you’re working with a licensed technician who uses proper technique and sterilized tools. Never allow your cuticles to be cut or pushed back too aggressively. When it comes to removal, avoid peeling or prying off gel polish. Instead, soak only the fingertips in acetone and follow with a nourishing oil or cream for nails and cuticles. Some salons use acetone-soaked cotton with foil wraps on the nail tips rather than submerging the entire hand. Between manicures, give your nails a break by taking “polish holidays” for a week or two. You can also use that time to rehydrate nails regularly with petroleum jelly or cuticle oil. As the industry evolves, you can also try other manicure methods, either between gel manicures, or as a safer alternative. Ask your manicurist if they offer other methods, such as the SNS Powder or Dazzle Dry manicures. Gel Manicure Alternatives

Do typical SPF products protect against the UV light used to cure gel?

Not reliably. Standard sunscreens are designed and tested for protection against sunlight, which is much less intense than the concentrated UVA light from gel manicure lamps. Even broad-spectrum formulas may not block enough UVA to make a meaningful difference during curing. That’s why the best protection is physical shielding. Fingerless UV-protective gloves are the gold standard, since they can block over 99% of the rays while still leaving your nails exposed for treatment. If gloves aren’t available, a broad-spectrum SPF 30+ can help if applied generously about 20 minutes before the appointment and reapplied before each lamp exposure.

How do you feel about the UK gel manicure ban?

I think the UK’s move reflects increasing concern about long-term risks that come with repeated UV exposure and nail damage. While gel manicures themselves aren’t inherently dangerous, misuse, overuse, or lack of proper protection can cause real problems. Bans like this also highlight the need for innovation in safer nail technologies. In the meantime, my message to patients is not one of fear, but of balance. Be mindful of the risks, protect your nails, and try safer alternatives that still give you long-lasting results.

What would you tell patients who have concerns about using gel polish but don’t want to give it up?

I always tell patients: if you love gels, you don’t necessarily need to give them up, but they might not be the best long-term option. Use them occasionally and look at other manicure methods. You just need to be smart about how you do them. Choose a skilled, licensed technician, protect your hands from UV exposure, and commit to proper removal. Hydrate your nails and give them breaks between manicures to allow recovery. Think of gels as an occasional indulgence, not a constant routine. With the right care, you can enjoy the benefits while minimizing the risks.

Best Face Masks for Clogged Pores | As Seen in Vogue

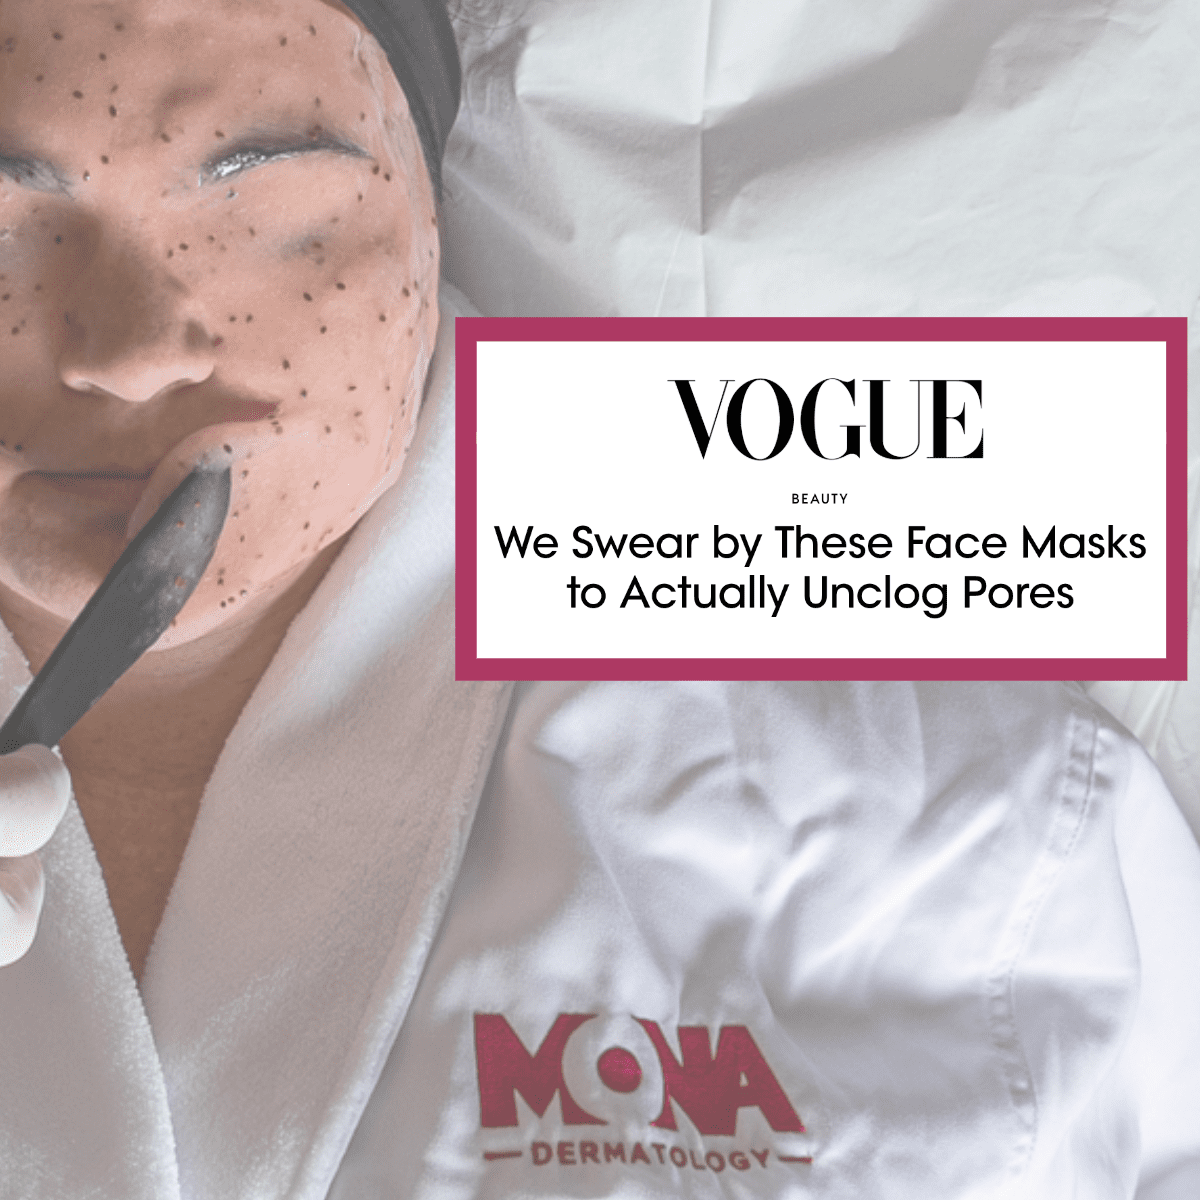
Clogged pores can be a frustrating issue, often leading to things like whiteheads, blackheads, and breakouts. Fortunately, there are effective solutions- like face masks- that can help clear and prevent congestion. Join Dr. Alexandra Bowles in learning more about face masks and which ones are the most effective. Check out the full article in Vogue!

Best Face Masks for Clogged Pores | As Seen in Vogue

What causes clogged pores?

Clogged pores happen when oil, dead skin cells, dirt, or other debris get trapped inside the tiny openings on your skin. These pores are home to hair follicles and sebaceous glands, which release oil and sweat. When they get congested, imperfections like blackheads, whiteheads, and breakouts can appear. While clogged pores are most common on the face, they can show up anywhere such as the neck, back, chest, or even the scalp. Everyone can experience them, but they’re more frequent in adolescents and young adults because hormones can ramp up oil production. Genetics also play a role, so if acne or oily skin runs in your family, your risk may be higher. Everyday habits, like skipping makeup removal, touching your face, wearing helmets or tight clothing, and even environmental factors like pollution, can make clogged pores worse. The good news is, understanding what’s causing the congestion is the first step toward clear, healthy-looking skin.

Do pore masks really work?

Pore masks, especially those with activated charcoal, have become a popular tool for targeting clogged pores and excess oil. Activated charcoal is made from naturally carbon-rich materials like bamboo, coconut, or wood. These ingredients are heated into a fine powder with tiny micropores that can trap toxins, dirt, and bacteria on the skin’s surface. When applied as a mask, it can help draw out impurities and leave your skin feeling clean and refreshed, making it particularly appealing for those with blackheads or acne-prone skin. However, while charcoal masks are effective at removing surface debris and oil, they don’t magically erase pores or provide long-term exfoliation or anti-aging benefits. I always stress how important safety is with pore masks. Peel-off masks can irritate sensitive skin or, in extreme cases, cause peeling, scarring, or allergic reactions. Pore masks can be a helpful part of your skincare routine, but they should complement, not replace, regular cleansing, exfoliation, and hydration.

Can you recommend some face mask products to help with clogged pores?

  • La Roche-Posay Effaclar Clarifying Clay Face Mask: This dermatologist-tested mask is perfect for oily or acne-prone skin, helping to balance oil and calm irritation. It has a creamy clay texture that’s easy to spread and rinses clean without leaving residue. I like how it leaves skin feeling refreshed, matte, and purified. Its light, almost neutral scent keeps the focus on the clarifying benefits.

  • Neutrogena Clear Pore 2-in-1 Facial Cleanser & Clay Mask: This affordable  dermatologist-tested formula works two ways: use it daily as an acne face wash or apply as a deep-cleansing clay mask. Made with 3.5% benzoyl peroxide acne medication, it treats breakouts and helps prevent new ones from forming. Kaolin and bentonite clay help absorb excess oil, control shine, and draw out impurities that clog pores. This dual-action cleanser/mask is ideal for oily and acne-prone skin. It rinses clean with no residue—leaving skin feeling fresh, purified, and smooth. 

  • OLEHENRIKSEN Cold Plunge Pore Mask: This mask is really refreshing with a cooling effect that quickly tightens pores and brightens up the skin. It combines clay and cucumber extract to detoxify while keeping skin hydrated and balanced. It’s like a mini spa moment at home. The subtle and fresh scent makes the experience even more comforting.

  • Dr. Jart+ Dermask Porecting Solution Face Mask: This mask uses charcoal and clay to draw out impurities and control excess oil, making it a good choice for congested skin. It has a smooth, gel-like texture that adheres comfortably to the face and doesn’t dry uncomfortably. I like how it leaves the skin feeling clean without stripping natural moisture. Its mild and neutral scent keeps the focus on the refreshing detoxifying effect.

  • La Mer The Deep Purifying Mask: La Mer’s mask is indulgent and mineral-rich, giving the skin a luxurious, spa-like treatment. It purifies pores while keeping skin soft, hydrated, and comfortable, no tight or dry feeling here. I love how creamy it feels going on, and the subtle, soothing scent adds to the pampering experience. It’s a perfect choice for a weekend self-care ritual when you want a little extra luxury.

  • Hero Cosmetics Pore Purity Cleansing Clay Mask: This mask is gentle yet effective, pulling out debris and excess oil without irritating the skin. Its creamy clay texture spreads easily and dries down just enough to feel purifying. I like that it balances the skin and leaves it looking fresh and healthy. The light, earthy scent is calming and makes the mask feel natural and approachable.

  • Beauty of Joseon Red Bean Pore Mask: This mask combines clay with antioxidant-rich red bean extract, offering both purifying and brightening benefits. It’s gentle enough for sensitive skin but still effective at refining texture and clearing pores. I appreciate the smooth, slightly whipped texture that’s easy to apply and rinse. The faint, natural scent is pleasant and adds to the soothing ritual.


Managing Chronic Skin Conditions in Cold Weather | As Seen in Flow Space

Winter can be tough on anyone’s skin, but for people with chronic conditions, the cold months often bring extra challenges. Dry air, indoor heating, and fluctuating temperatures can strip moisture from the skin, making it more prone to irritation, redness, and flare-ups. Board-certified dermatologist Dr. Alexandra Bowles explores why winter can be particularly difficult for conditions like eczema, psoriasis, rosacea, acne, and hidradenitis suppurativa—and share practical tips for keeping your skin calm, hydrated, and comfortable all season long. Be sure to check out the full article in Flow Space!

Managing Chronic Conditions in Cold WeatherWhy can winter be so hard for people with chronic skin issues?

Winter creates an environment that is naturally challenging for the skin. Cold air, low humidity, and indoor heating all pull moisture away from the skin barrier, which makes already sensitive or inflamed conditions more reactive. For people with eczema or psoriasis, the barrier becomes more vulnerable, which leads to itching, flaking, and redness. Rosacea often flares because blood vessels respond quickly to temperature shifts. Even acne can worsen as the skin becomes drier and overcompensates by producing more oil. The seasonal drop in sunlight can also impact vitamin D levels, which play a role in immune balance and skin healing. All of these factors together can make chronic skin conditions feel harder to manage during the winter months, even when someone has a solid routine.

What tips can you suggest for relieving different symptoms in cold, dry weather? 

Supporting the skin barrier is the most important step during winter, no matter the diagnosis. For eczema and psoriasis, using thicker creams or ointments right after bathing helps seal in hydration and calm inflammation. For rosacea, gentle cleansing, soothing ingredients, and daily sunscreen can reduce flares caused by wind and temperature changes. Acne-prone skin often does best with non-comedogenic moisturizers that prevent dry, tight skin from triggering more breakouts. For hidradenitis suppurativa, minimizing friction with soft, breathable fabrics and keeping the area dry and clean can reduce discomfort. Small lifestyle adjustments also help a great deal, such as shorter warm showers, adding a humidifier to the home, drinking enough water, and moisturizing consistently. These changes create an environment where the skin can stay calm and comfortable even when the weather is not.

How to Treat Foot and Toenail Fungus | As Seen in HuffPost

Foot and toenail fungus can be tricky to get rid of, especially when the infection thrives in moist areas like our shoes and skin. Listen to Dr. Alexandra Bowles give us some insight on why these infections happen and how to treat them. Be sure to check out the full article in HuffPost!

How to Treat Foot & Toenail Fungus | As Seen in HuffPost

What can cause the formation and persistence of foot and toenail fungus? Are there different kinds?

Foot and toenail fungus develops when fungi, such as dermatophytes, molds, or yeast, feed on keratin in nails and outer skin layers. They often thrive in the warm, damp environment of our shoes and skin. These infections can linger because fungal spores remain in footwear or on surfaces, ready to regrow when conditions allow. Some people are genetically more prone to chronic fungus since their immune system doesn’t recognize it as harmful, making reinfections common. The most frequent nail infection is onychomycosis, while skin infections often fall under athlete’s foot (tinea pedis). Athlete’s foot has four variations: toe web type, moccasin type, vesicular type, and the rare ulcerative type. The toe web type is most common between the toes, and moccasin type causes thickened, cracked skin on the soles and heels. The vesicular type often includes itchy, fluid-filled blisters, and the ulcerative type is marked by painful open sores. Children tend to fight these organisms off more effectively, while adults, especially those with diabetes or circulation problems, struggle with recurrence. Together, these conditions are frustrating but manageable with proper diagnosis, treatment, and prevention.

When it comes to products aimed at treating fungus, are there some key ingredients that people should look for? How do these products work?

When treating toenail or foot fungus, it’s important to know which ingredients actually target the infection and which simply improve nail appearance. True antifungals like clotrimazole work by stopping fungal growth at the source, making them great over-the-counter options for mild infections. Other ingredients such as urea, lactic acid, and salicylic acid don’t kill fungus directly but help by softening or thinning thickened nails, allowing antifungal agents to penetrate more effectively. Hydrating agents like propylene glycol can also keep nails flexible and reduce brittleness. Some people explore natural options like tea tree oil, menthol, or vinegar soaks, which may offer mild relief, but are less reliable than medications. The bottom line is to use products that contain both antifungal ingredients and support nail health. This will give you the best chance of managing symptoms while addressing the underlying infection.

Can you recommend the best products to treat and prevent foot and toenail fungus? Any specific socks, foot powders, nail treatments, shoes?

For patients dealing with toenail or foot fungus, I usually suggest a few reliable products that work best when combined into a routine. Tolnafate or other clotrimazole-based solutions help target the fungus directly. These products can be applied daily to the nail and surrounding skin. Antifungal foot powders are a great way to reduce foot moisture and stop fungal growth. You can also try moisture-wicking socks made from merino wool or synthetic blends, which can prevent sweat from lingering. I also recommend choosing breathable shoes, like sneakers with mesh uppers. It’s also a good idea to rotate your daily shoes so they have time to air out between wears. For an extra layer of prevention, some patients benefit from UV shoe sanitizers, which help kill fungus and bacteria inside footwear. When used together, these products not only treat fungal infections but also create an environment where fungus is far less likely to thrive.

Are there any other tips you can give us for dealing with foot and toenail fungus?

Toenail and foot fungus can be stubborn, so patience and consistency are key when treating them. Even with the right products, it often takes several weeks or months to see noticeable improvement because nails grow slowly. Preventive habits are just as important as treatment itself. Take care of your feet by keeping them clean and dry, trimming nails regularly, and wearing breathable socks and shoes. Be sure to avoid walking barefoot in communal areas where fungi can thrive. If you have persistent infections, pain, or an underlying health condition like diabetes, I strongly recommend seeing a doctor or podiatrist for more targeted care.


SPF Myths, Facts, and Smarter Sun Protection | As Seen in Real Simple

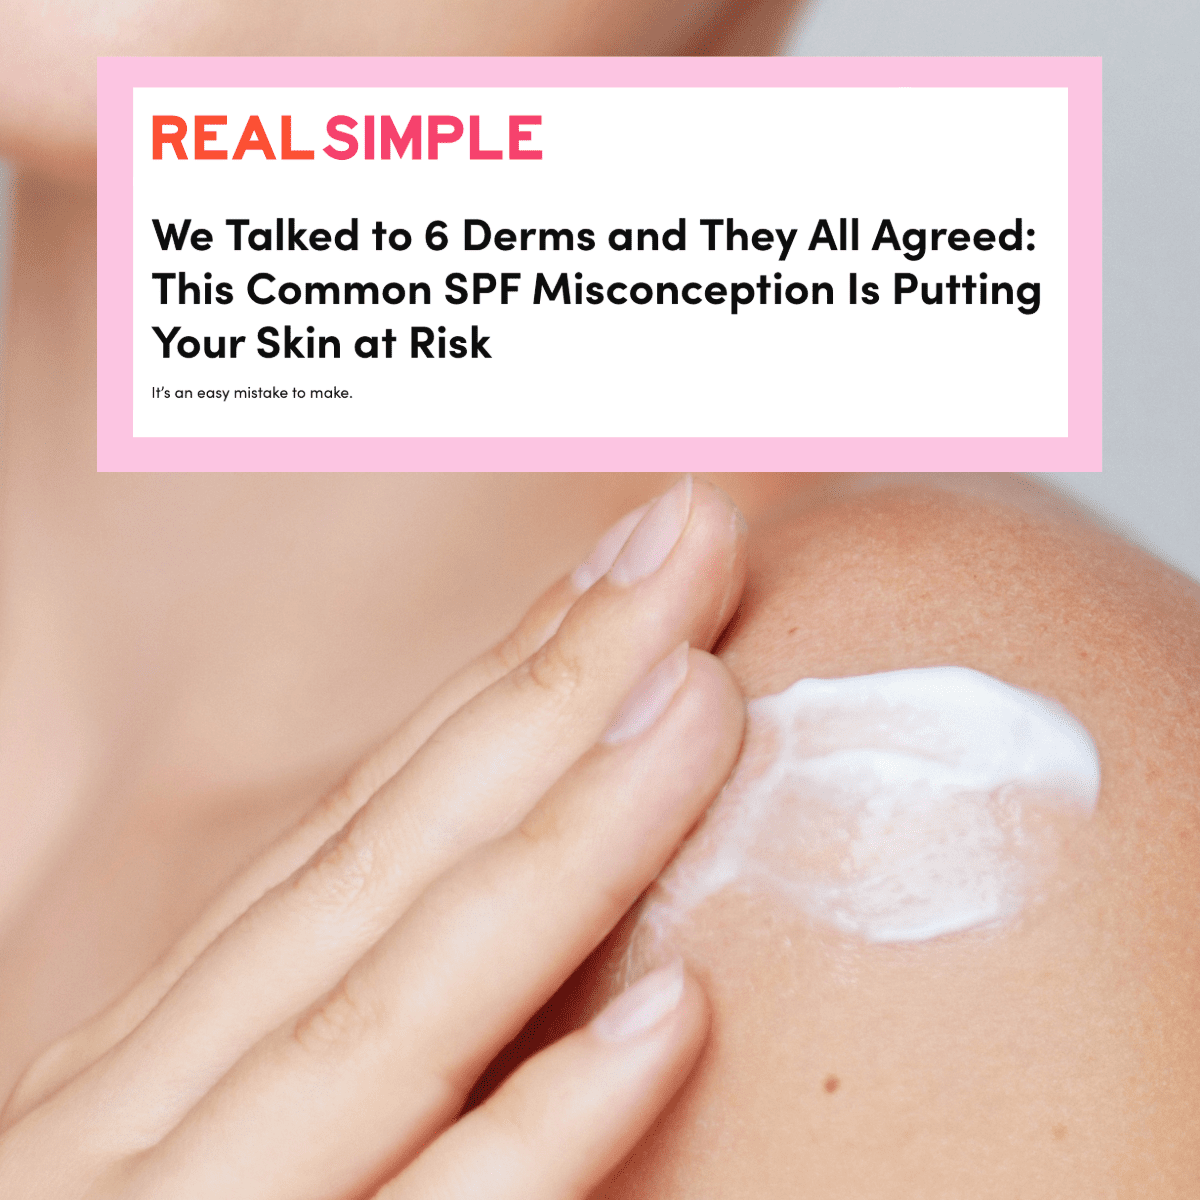
We all know that using sunscreen is the best way to protect your skin on those bright, sunny days. But there’s a bit more discourse on the best methods and products to use for the most protection against harmful rays. Hear board-certified dermatologist Dr. Alexandra Bowles share some insights and debunk some common SPF misconceptions, and be sure to check out the full article in Real Simple!

SPF Explained: Myths, Facts, and Smarter Sun Protection

What are your thoughts on high SPF? Does it ever work better than the recommended 30?

High SPF sunscreens can offer slightly more UVB protection than SPF 30, but the difference isn’t as dramatic as many people think. For example, SPF 30 blocks about 97% of UVB rays, while SPF 50 blocks around 98%, a small difference that can create a false sense of security. What matters most is applying sunscreen generously and reapplying every two hours, no matter the SPF. I always recommend a broad-spectrum sunscreen with at least SPF 30 for daily use, and higher SPFs if you’re at higher elevations, near the equator, or have increased risk factors. Just remember: sunscreen is one part of a full sun-protection strategy. Don’t skip the hats, shade, and protective clothing!

What happens if you don’t apply enough of the high SPF or don’t apply it as frequently as needed?

If you don’t apply a high enough SPF or skip reapplying it every two hours, your skin won’t get the full protection listed on the label. This can leave you vulnerable to sunburn, premature aging, and even skin cancer. Underuse can also lead to uneven coverage, which increases the risk of pigmentation issues or flare-ups in sensitive skin conditions like melasma or rosacea. For SPF to do its job, consistency and the right amount matter just as much as the number on the bottle.

What is your recommendation for any and all sunscreen application?

I always remind my patients that how you apply your sunscreen is just as important as which one you choose. For full protection, apply a generous amount, about a nickel-sized dollop for the face and a shot-glass amount for the whole body, at least 15 minutes before sun exposure, and reapply every two hours when outdoors or immediately after swimming or sweating. Don’t forget commonly missed spots like your ears, neck, and the tops of your hands and feet. Sunscreen should be worn daily, not just at the beach, but also anytime you’re exposed to daylight, including while driving, sitting near windows, or taking a quick walk outside. UV rays are present year-round and can penetrate clouds and glass, so daily SPF is one of the best habits you can adopt for long-term skin health.

Which SPF products would you recommend?

Colorscience Sunforgettable Total Protection Face Shield Classic SPF 50 –This hydrating, antioxidant-rich mineral formula provides complete protection from environmental aggressors in a weightless texture that blends in sheer, for a natural bare-faced finish. I love the tinted formula and that they have different shades to choose from!

EltaMD UV Daily SPF 40 – Lightweight, hydrating, and perfect under makeup, this is a great everyday sunscreen for dry or sensitive skin. It contains hyaluronic acid and antioxidants to nourish while protecting.

La Roche-Posay Anthelios Melt-in Milk SPF 60 – Another daily go-to that’s widely available and works well for all skin types. Its non-greasy finish makes it ideal for layering.

Repairing Skin Post-Breakout | As Seen in Girl’s Life

Breakouts can be a huge inconvenience, made worse when scars and dark spots linger. Learn more about how to repair skin post-breakout from board-certified dermatologist Dr. Alexandra Bowles, as featured in Girl’s Life.

Repairing Skin Post-Breakout: As Seen in Girl's Life

What are the steps to getting skin back to even-toned and healthy after a breakout?

If you’re a teen dealing with post-breakout marks, you’re definitely not alone. The good news is that you can take simple, practical steps to help your skin heal. Start with a gentle cleanser (no scrubbing!) and a lightweight, oil-free moisturizer to keep your skin balanced. Sunscreen is a must every day, even when it’s cloudy, because sun exposure can make dark marks linger. Ingredients like niacinamide, retinol, and vitamin C can help fade spots, but go slow and steady. Remember, healing takes time, so try not to pick or pop pimples, no matter how tempting it is. Doing so can make those blemishes look worse and last longer.

Are there any lifestyle habits that help? Any products or practices that should be avoided or added in?

After a breakout, it’s really important for teens to avoid picking or squeezing. Using zit stickers can be a gentle reminder to keep their hands off, especially if the spots are open or scabbing. Keeping your skin clean with a gentle cleanser and a lightweight moisturizer helps your skin heal without causing extra irritation. Don’t forget sunscreen every day, because sun exposure can make those marks stick around longer. After sports, wash your face as soon as possible to clear away sweat and bacteria that can trigger more breakouts. And if you wear makeup, always make sure to remove it entirely before bedtime so your skin can breathe and repair overnight. Drinking plenty of water and staying hydrated is another simple but powerful way to support your skin’s natural healing. Plus, getting enough rest and managing stress really support your skin’s healing process, so don’t overlook those healthy habits!

What about ingredients to incorporate? Vitamin C to brighten discoloration? Chemical exfoliants to resurface the skin?

Absolutely! Vitamin C is an excellent addition to help brighten dark spots and even out your skin tone, giving your complexion a healthy glow. Gentle chemical exfoliants like AHAs (such as glycolic acid found in products like SkinMedica AHA/BHA Exfoliating Cleanser) or BHAs (like salicylic acid in Skinmedica Pore Purifying Cleanser or Cerave Acne Control Cleanser) can help resurface the skin by removing dead cells and promoting cell turnover. But it’s important to start slowly to avoid irritation. Always pair these treatments with daily sunscreen to protect your skin and prevent further discoloration. And don’t forget to keep your skin well-moisturized to support its natural barrier and help everything else work better.

If you were to put together a daily/weekly regimen for a teen girl who’s trying to repair her skin post-breakout, what would that look like?

If I were to put together a daily and weekly skincare regimen for a teen girl repairing her skin after a breakout, I’d start with a gentle cream cleanser formulated for acne, ideally one with salicylic acid or benzoyl peroxide. Washing twice a day, and always after sweating, helps keep pores clear without over-drying the skin. Next, using pimple patches or spot treatments with ingredients like benzoyl peroxide can calm inflammation and protect the skin from picking, which is so important to avoid scarring. If she wears makeup, I’d encourage her to choose non-comedogenic products and make sure to remove all makeup gently at the end of the day. Hydration is key, so I’d recommend a lightweight, oil-free moisturizer to balance the skin, especially when using acne-fighting products that can be drying. A daily application of a non-comedogenic sunscreen with at least SPF 30 is essential to protect healing skin from sun damage and prevent dark spots.

What can she do for scars that have been left behind? Any tools that would help, like a red light mask?

Patience and gentle care are key when it comes to fading scars left behind after a breakout. Your skin needs time to heal, and that’s completely normal. Ingredients like vitamin C and niacinamide can really help brighten and even out skin tone over time, especially when used consistently. Red light therapy can also be an added tool. It supports your skin’s natural healing process, reduces inflammation, and may help improve the overall appearance of scars. And while it’s tempting to try a bunch of new products at once, keeping your routine simple and soothing is best so you don’t overwhelm or irritate your skin. Most importantly, don’t forget your daily sunscreen. Protecting your skin from the sun prevents scars from darkening and helps them fade more evenly.

Is there anything else that you think is important to include on the topic of repairing skin post-breakout for a teen?

When it comes to healing your skin after a breakout, two of the most important things you can do are to be patient and protect your skin daily. It’s so important to treat your skin with kindness, so avoid picking, scrubbing too hard (scrubbing can make breakouts worse!), or using too many active products all at once. And don’t skip your sunscreen! Daily SPF helps prevent dark spots from getting darker and supports your skin’s natural healing process. If you enjoy wearing makeup, that’s perfectly fine too. Just look for products that won’t clog your pores and always wash them off gently at night to keep your skin clear and calm. Remember, gentle care and consistency are your best friends on the road to healthy skin.

Anniversary Event